For more advanced projects, you need to change values and read data in real time, which is not possible with the standard delay function in Arduino. Therefore, a different solution is needed. Luckily, HeliOS can help.
The Limitations of Arduino
As mentioned in the introduction, the standard language of an Arduino can be applied in many ways. However, there is a problem: the Arduino cannot multitask. For example, you cannot set three different LEDs to blink at independent intervals. This task cannot be carried out because, if you use delay, the LED with the longest delay will block the blinking of the other LEDs while waiting to switch states.
Standard polling is also troublesome, as checking the state of a button requires an action to be taken. In a standard Arduino, you have to setup a function to poll the state of a switch or any other state.
While there are solutions for addressing these issues (e.g., hardware interrupts, the millis function, the FreeRTOS implementation), but these solutions also have limitations. To overcome the issues of these solutions, Mannie Peterson invented HeliOS. HeliOS is small and efficient, and it can even run on 8-bit controllers.
Consider the code below, which is unreliable at best because the delay statement will prevent the button from being checked.
int ledPin = 4; // the number of the LED pin
// variables will change:
int buttonState = 0; // variable for reading the pushbutton status
void setup() {
// initialize the LED pin as an output:
pinMode(ledPin, OUTPUT);
pinMode(LED_BUILTIN, OUTPUT);
// initialize the pushbutton pin as an input:
pinMode(buttonPin, INPUT);
}
void loop() {
// read the state of the pushbutton value:
buttonState = digitalRead(buttonPin);
// check if the pushbutton is pressed. If it is, the buttonState is HIGH:
if (buttonState == HIGH) {
digitalWrite(ledPin, HIGH); // turn LED on
} else {
digitalWrite(ledPin, LOW); // turn LED off
}
digitalWrite(LED_BUILTIN, HIGH); // turn the LED on (HIGH is the voltage level)
delay(1000); // wait for a second
digitalWrite(LED_BUILTIN, LOW); // turn the LED off by making the voltage LOW
delay(1000); // wait for a second
}
When you run this code you will see that the ‘ledPin’ will blink normally. However, when you push the button, it will not light up, or if it does, it will delay the blink sequence. To make this program work, you can switch to other delay methods; however, HeliOS provides an alternative.
Linux Embedded on Arduino (HeliOS)
Despite the “OS” in its name, HeliOS is not an operating system: it is a library of multitasking functions. However, it does implement 21 function calls that can make simplify complex control tasks. For real-time tasks, the system must handle external information as it is received. To do so, the system must be able to multitask.
Several strategies can be used to handle real-time tasks: event-driven strategies, run-time balanced strategies and task notification strategies. With HeliOS, you can employ any of these strategies with function calls.
Like FreeRTOS, HeliOS enhances the multitasking capabilities of controllers. However, developers who are planning a complex project of critical importance need to use FreeRTOS or something similar because HeliOS is intended for use by enthusiasts and hobbyists who want to explore the power of multitasking.
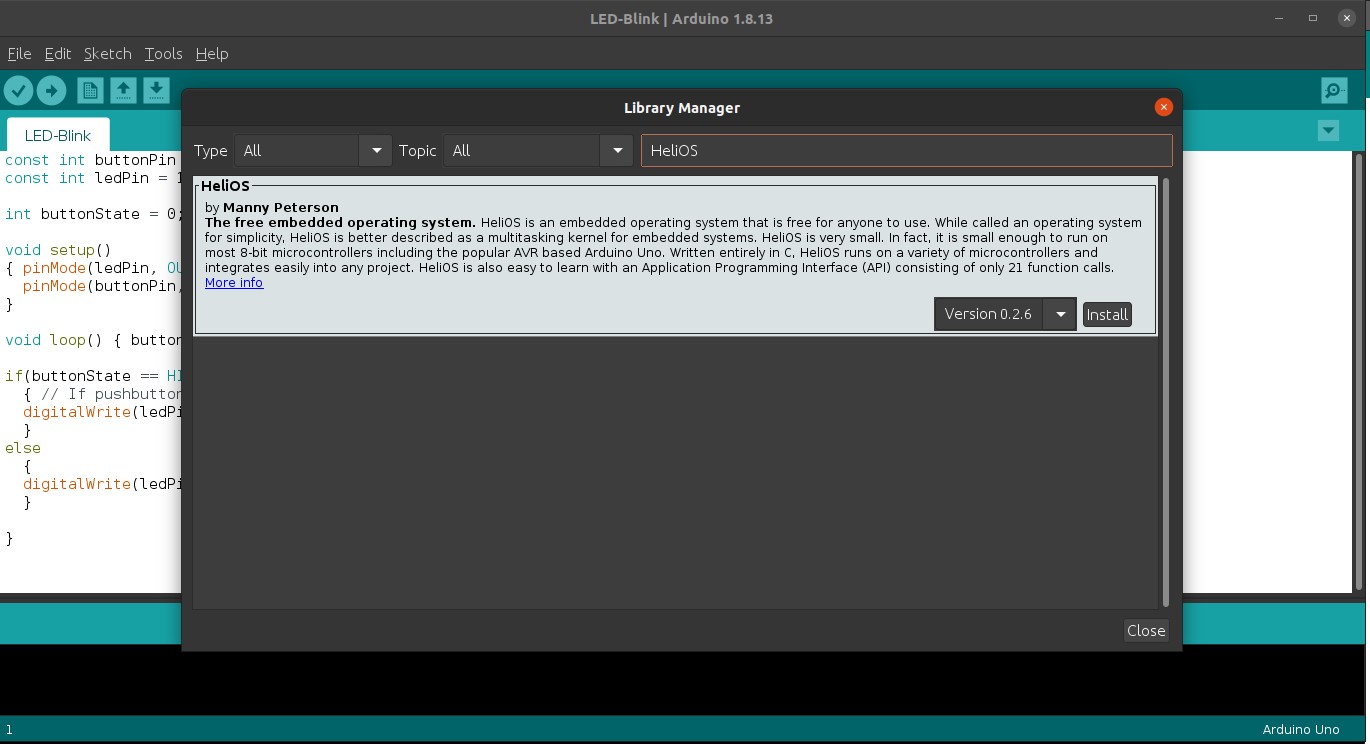
Installing HeliOS
When using the Arduino libraries, new libraries can be installed with the IDE. For versions 1.3.5 and above, you pick use the Library Manager.

Alternatively, you can download a zip file from the webpage, and use that file to install HeliOS.
Please note that you need to include HeliOS in your code before you can start using it.
Example
The code below can be used to make an LED blink once per second. Although we have added HeliOS code, the final effect is the same as that of the introductory tutorial.
The main difference here is that you must create a task. This task is put into a waiting state, and a timer is set to tell the task when to run. In addition, the loop contains only one statement: xHeliOSLoop(). This loop runs all the code defined in the setup() of the code. When you plan your code, you need to set all pins, constants and functions in the top setting.
//Used to store the state of the LED
volatile int ledState = 0;
volatile int buttonState = 0;
const int buttonPin = 2;
const int ledPin = 4;
// Define a blink task
void taskBlink(xTaskId id_) {
if (ledState) {
digitalWrite(LED_BUILTIN, LOW);
ledState = 0;
} else {
digitalWrite(LED_BUILTIN, HIGH);
ledState = 1;
}
}
}
// Define a button read task
void buttonRead(xTaskId id_) {
buttonState = digitalRead(buttonPin);
// check if the pushbutton is pressed. If it is, the buttonState is HIGH:
if (buttonState == HIGH) {
// turn LED on:
digitalWrite(ledPin, HIGH);
} else {
// turn LED off:
digitalWrite(ledPin, LOW);
}
}
void setup() {
// id keeps track of tasks
xTaskId id = 0;
// This initialises the Helios data structures
xHeliOSSetup();
pinMode(LED_BUILTIN, OUTPUT);
pinMode(ledPin, OUTPUT);
// initialize the pushbutton pin as an input:
pinMode(buttonPin, INPUT);
// Add and then make taskBlink wait
id = xTaskAdd("TASKBLINK", &taskBlink);
xTaskWait(id);
// Timer interval for 'id'
xTaskSetTimer(id, 1000000);
id = xTaskAdd("BUTTON", &buttonRead);
xTaskStart(id);
}
void loop(){
//This, and only this, is always in the loop when using Helios
xHeliosLoop();
}
With this code, you can program the LED to blink at any time without having to worry about the Arduino being delayed.
Conclusion
This project is great for people who are new to Arduino, as it lets you use the regular Arduino code to handle real-time tasks. However, the method described in this article is for hobbyists and researchers only. For more serious projects, other methods are necessary.