GitScrum is a free, open-source task management tool that you can use to manage projects with ease. GitScrum uses the famous Git platform and Scrum software methodology to allow for more effective team management. This software helps users to track time consumed to perform various tasks and keep a record of projects that users are working on. Users can create multiple projects, keep a record of projects assigned to different users, and even chat in real-time. This article shows you how to install GitScrum in Debian 10.
Prerequisites
- Access to a Debian 10 server
- A valid domain name to point the server IP
- Root user privileges
Installing GitScrum in Debian 10
To install GitScrum in Debian 10, first, open the terminal window using the Ctrl+Alt+T shortcut. Then, update the system to the latest available version by issuing the following command:
![]()
After that, upgrade the apt package using the command given below:
![]()
Now that the system and apt package have been updated, we will begin the installation process.
Step 1: Install LAMP Server
First, you will need to install an Apache webserver, MariaDB server, and PHP, along with the extensions that are needed for the LAMP server. To install the LAMP server, enter the following command:

Step 2: Edit PHP File and Authenticate System
Once you have installed the server, open the php.ini file to make some edits:
![]()
In the file, change the following values:
upload_max_filesize = 100M
max_execution_time = 300
date.timezone = Asia/Kolkata
Save the modified file using the Ctrl+O shortcut.
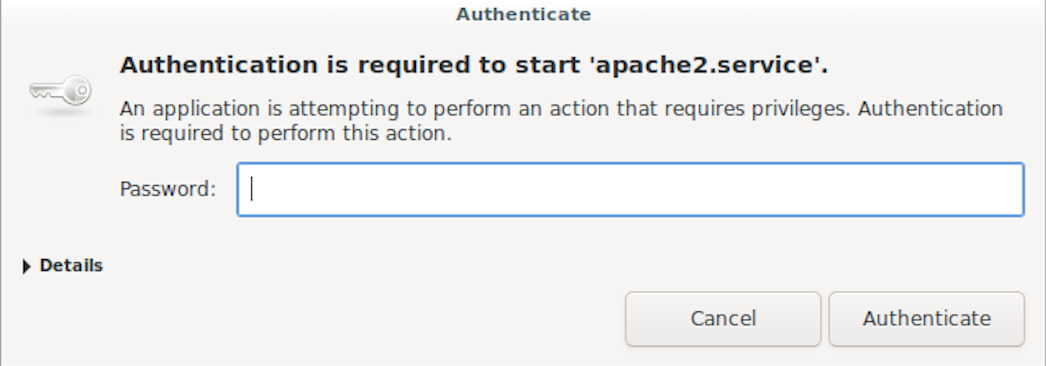
Now, start the Apache and MariaDB service. Issue the following command in the terminal to start Apache:
![]()
If the system asks for authentication, simply enter the password and click the Authenticate button.
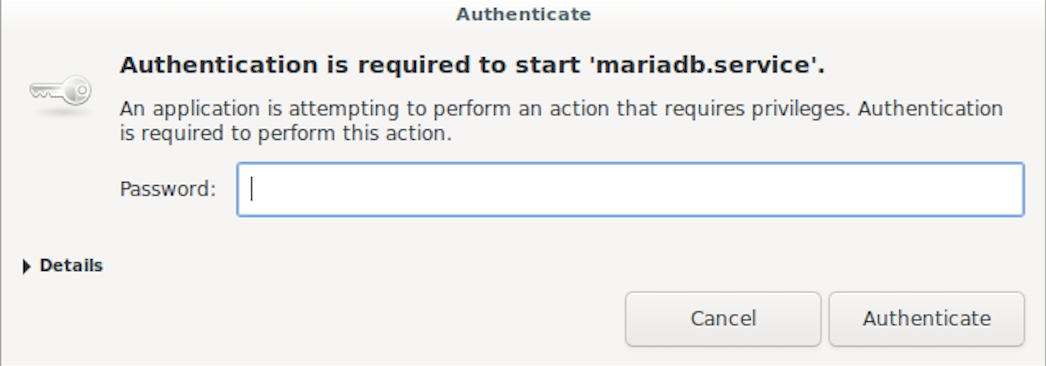
Now, start the MariaDB service using the following command:
![]()
Complete the authentication process.
Enable apache to start after system reboot using the command below:
![]()
Authenticate the system.
After that, an output will appear that is similar to this one:

Enable MariaDB to start after system reboot using the following command:
![]()
Then, authenticate the system.
Step 3: Configure MariaDB Database
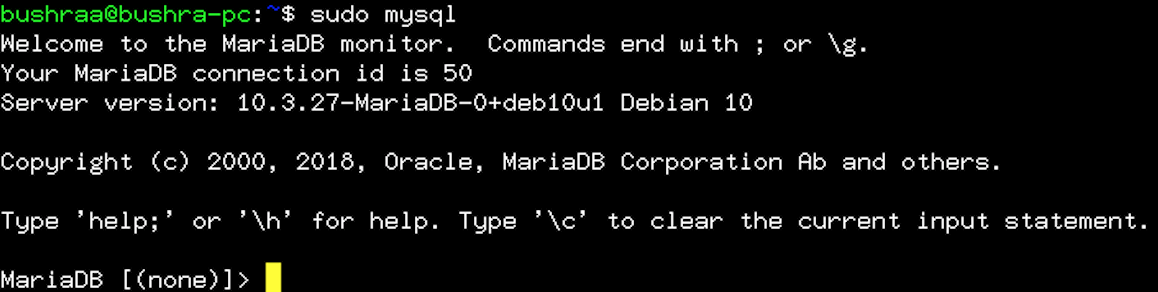
The MariaDB root password is configured initially, so, you will be required to set a password. Log in to the MariaDB shell using the following command:
![]()
After you hit Enter, the output will appear as follows:
Set up the password using the following command:
![]()
Provide values for the root user and localhost, then enter the password you want to set.
After that, create the database and a user for GitScrum using the command provided below:

Next, create the GitScrum user using the following command:

The next step is to grant all the rights and privileges of the GitScrum database using the following:

Flush the privileges using the command given below:
![]()
And then, exit by issuing the following:

Step 4: Install Composer
Composer is the supporting manager for the PHP package that is a must-have for our project. Download the composer file using the following command:

To confirm the download and data integrity of the file, issue the command given below:

The phrase Installer Verified in the output shows that everything is running correctly.
To install the composer, run the following command:

After some time, you will see an output like this one:

Step 5: Install GitScrum
First, change the directory to your Apache root directory. Then, you can download GitScrum.
![]()
To download GitScrum, use the following command:

When you press Enter, the installation will begin. After some time, you will see an output like this:

Update and change the directory to the downloaded directory. Next, update GitScrum with the following command:
![]()
Once you are in the directory, enter:
![]()
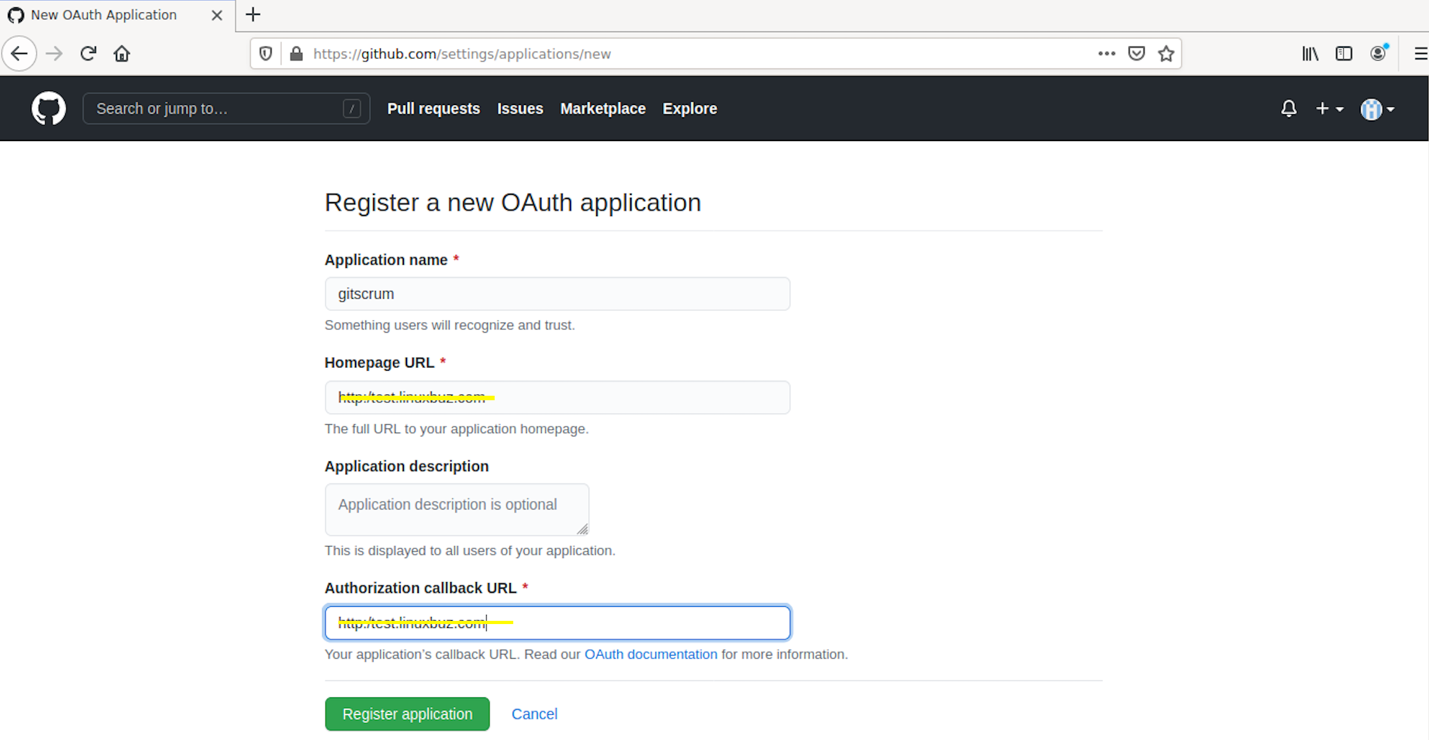
To integrate GitScrum with Github, you will have to create an app in Github. Access this link, and you will see the following screen appear:

Log in to your account or sign up for a new one. Then, you will see the screen to Register a new OAuth application. Provide the Application name, Homepage URL (which must be running and responding to server requests), and Application callback URL.
Then, click Register Application. After that, you will see the following screen appear:
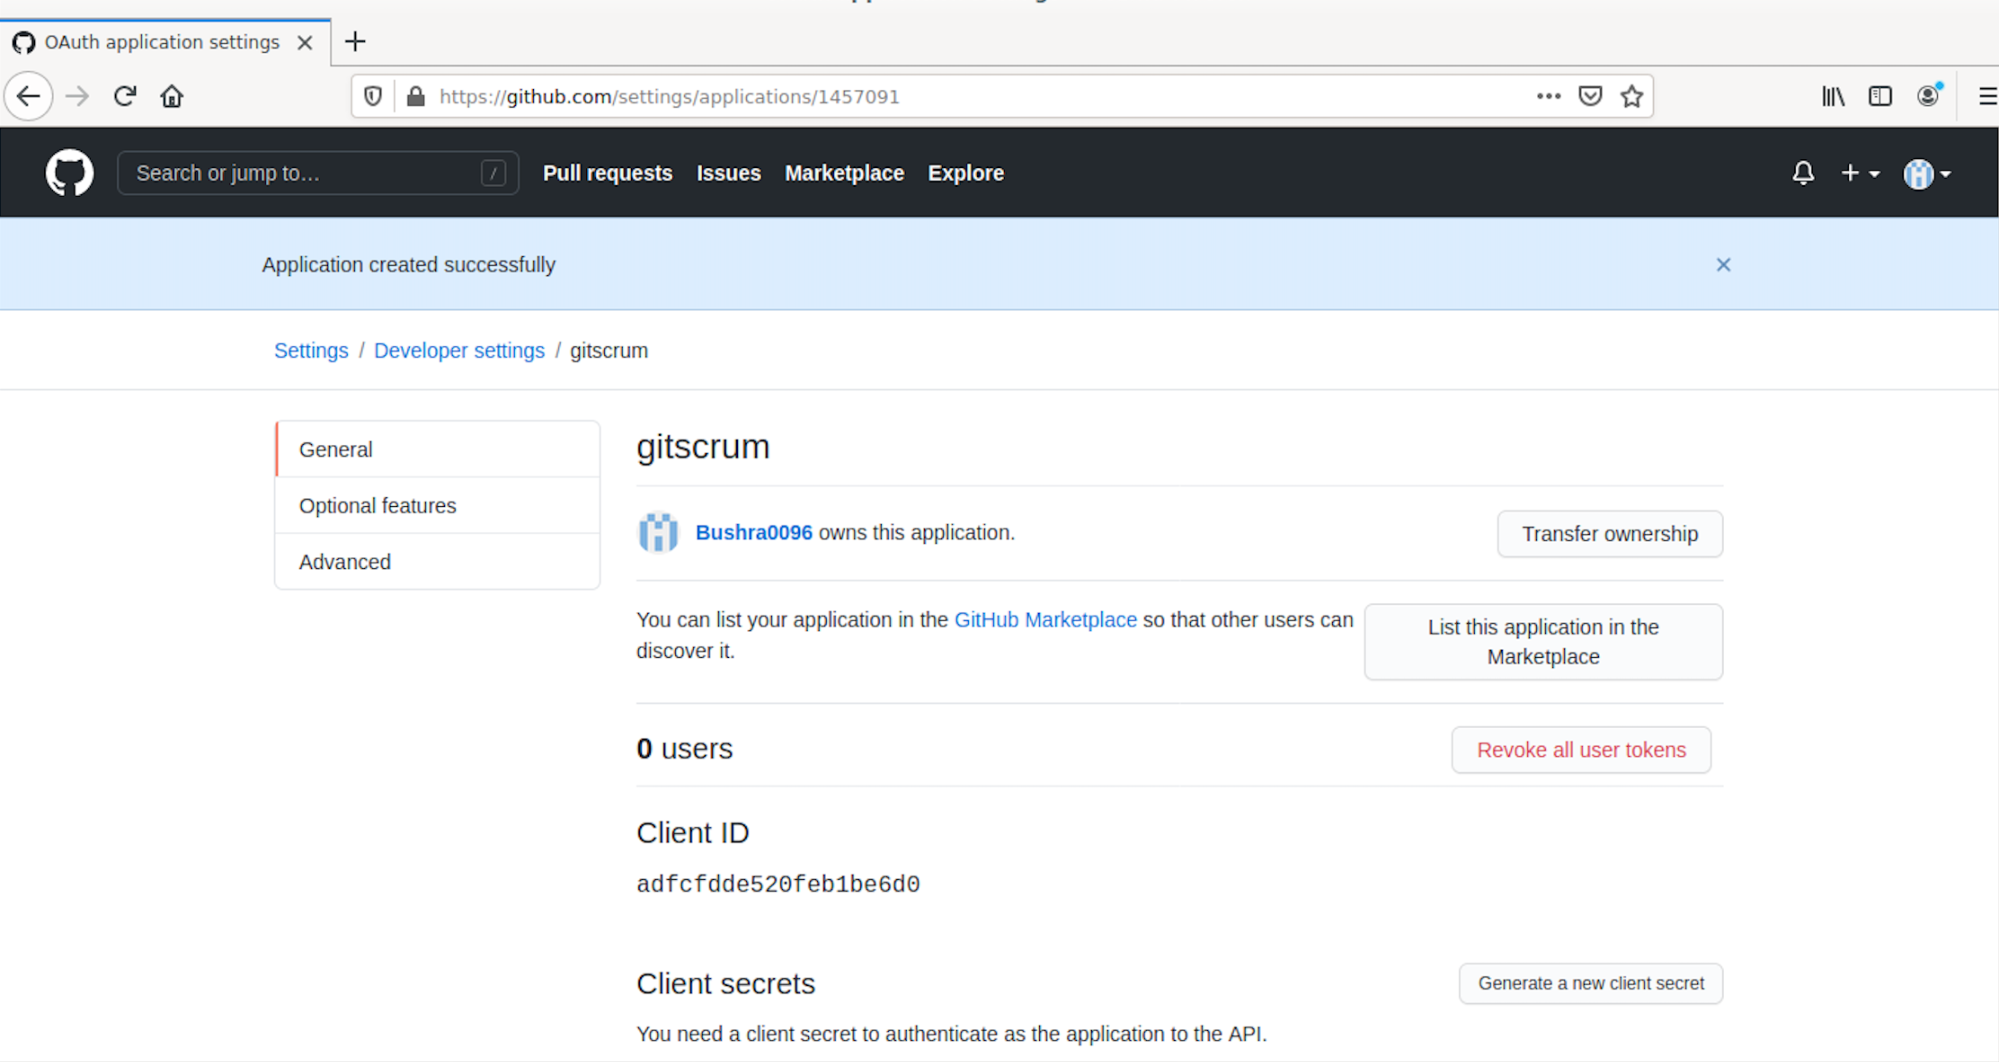
The next step is to use the Client ID and Client Secret from the application registration page and paste them into the .env file. Access the file using the following command:
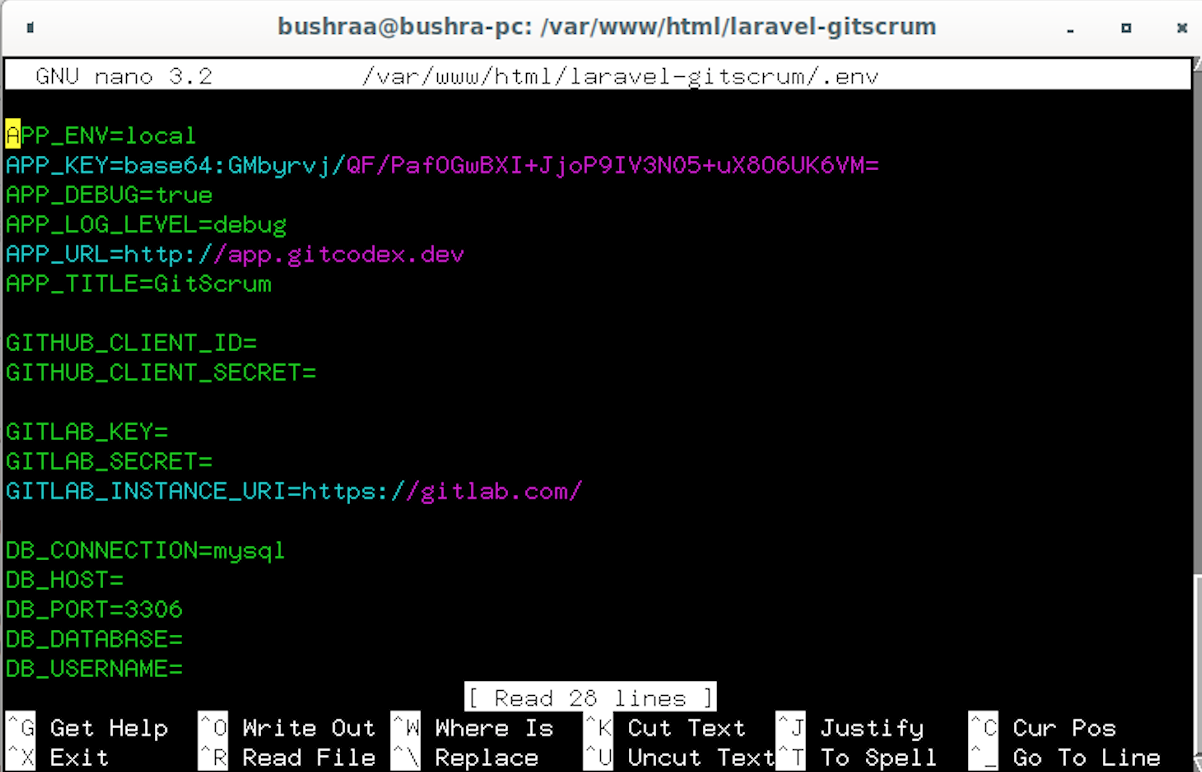
Here, provide the Client ID and Client Secret, then close the file using the Ctrl+O shortcut.
Run the following command to migrate the database:
![]()
Then, enter the following command:
![]()
After that, change the permissions using the command given below:

The permissions will begin to change; once they are done, update the other set of permissions using the following command:

Configuring Apache for GitScrum
To configure the Apache virtual host for GitScrum, access the file using the following command:

Add the following lines of code to the file. Replace ServerAdmin and ServerName with the server you want to configure it with.
ServerAdmin [email protected]sitename.com
# Admin Server address
DocumentRoot /var/www/html/laravel-gitscrum/public
# Path to the document root directory
ServerName test.website.com
# Name or URL of the the server
<Directory /var/www/html/laravel-gitscrum/public>
Options FollowSymlinks Allow
# Path or directory and the permissions
Override All Require all granted </Directory>
ErrorLog ${APACHE_LOG_DIR}/error.log
# Calling the error logs if any
CustomLog ${APACHE_LOG_DIR}/access.log
# Calling the custom logs
combined </VirtualHost>
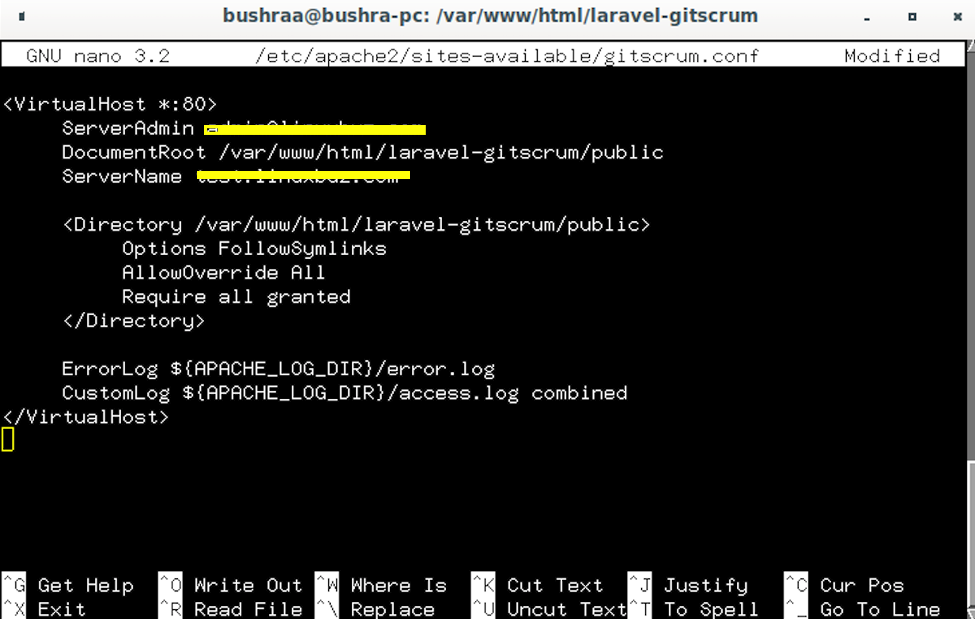
Save the file. To check the Apache configuration, use the following command:
![]()
The syntax OK means that the output is correct.

Enable the virtual host and Apache rewrite module using the command given below:
![]()
Now, rewrite the module using the following command:
![]()
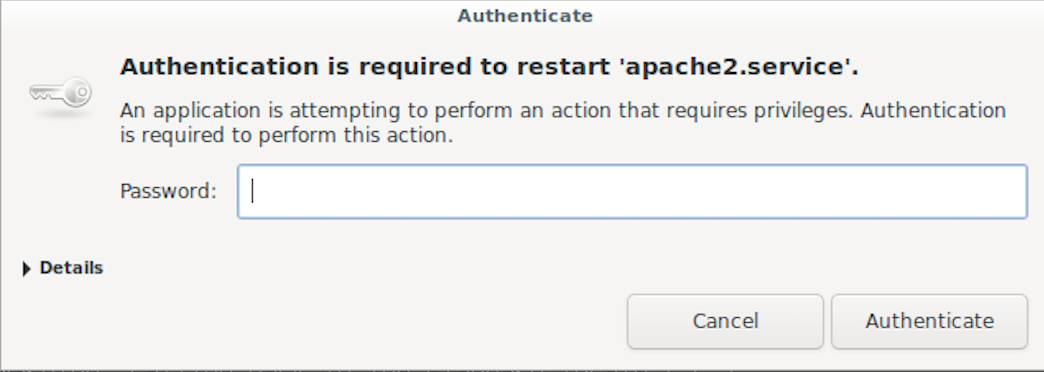
Restart the Apache webserver/service to reflect these changes:
Here, provide the authentication to restart the service:
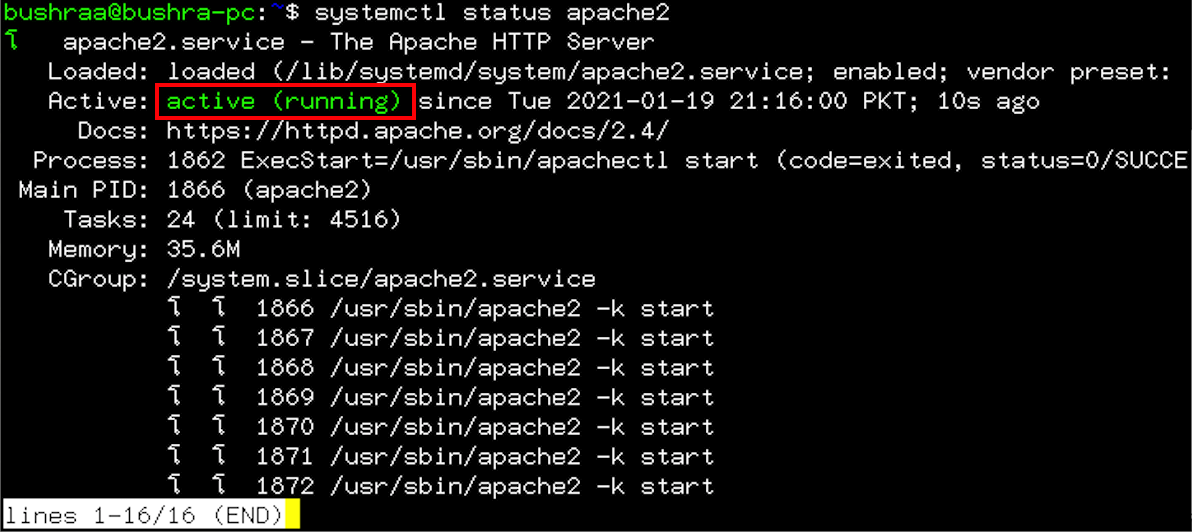
To check the status of the Apache service, use the following command:
![]()
The output shows that the server is running properly.
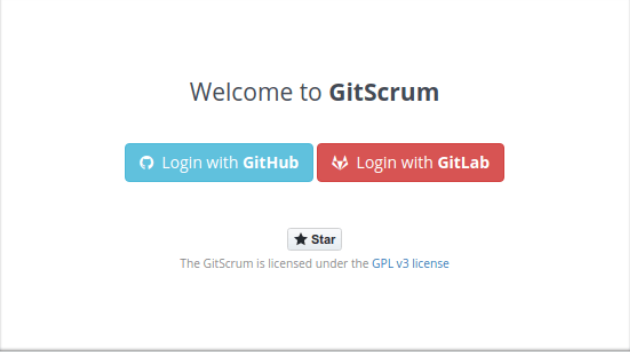
The last step is to access the GitScrum website based on the URL you used in the implementation process. Then, you will authorize your account to use GitScrum in Debian 10.
Conclusion
This article showed you how to install and configure GitScrum on a Debian 10 server. We began with the installation of the LAMP server, then installed Composer and GitScrum, and finally performed the necessary configurations. Feel free to use this method to install and configure GitScrum using Apache and other supporting packages on your Debian 10 server.