The Clear Linux Project for Intel Architecture is building a Linux OS distribution targeted for various cloud use cases. The goal of the Clear Linux OS is to showcase the best of Intel Architecture technology, from low-level kernel features to more complex use cases that span the entire operating system stack. Emphasis is been put on Power and Performance optimizations throughout the operating system as a whole.
Clear Linux Key Features
- With Clear Linux OS stateless feature, it can effectively perform a “factory reset” on the system and you can immediately set it up again
- With Clear Containers, ways are been worked on to improve security of containers by using Intel Virtualization Technology
- Cloud Integrated Advanced Orchestrator (ciao) is a new workload scheduler designed to address limitations in current cloud OS projects
- Clear Linux for Intel Architecture includes a telemetry solution that rapidly detects and responds to quality issues in the field
- Clear Linux OS for Intel Architecture is the first Linux distribution that supports auto proxy
- Mixing is a term we use to describe composing an OS for very specific use cases
- AutoFDO uses a sampling-based profile to drive feedback-directed optimizations
- Function Multiversioning (FMV) is a compiler feature that is capable of optimizing the same code for multiple architectures, automatically selecting the correct architecture-specific version of the code at runtime
How to Install Clear Linux on a Virtual Machine using VirtualBox
Create a virtual machine in VirtualBox
- Download the latest live version (clear-XXXX-live.img.xz)
[su_button url=”https://download.clearlinux.org/image/” target=”blank” icon=”icon: download”]DOWNLOAD THE LIVE IMAGE[/su_button]
- Decompress the downloaded image.
- On Linux Machine
xz -d clear-XXXX-live.img.xz
-
-
On a Windows Machine, use 7zip.
-
- Convert the raw image to VDI format by running either of the following commands (Note: open the command prompt as an Administrator > Change to directory Virtualbox was installed on, in my case “E:\program Files\Oracle\VirtualBox”. Then note to point to directory you extracted the image file to)
VBoxManage convertfromraw e:\Ubuntu\clear-linux\clear-12540-live.img e:\Ubuntu\clear-linux\clear-12540-live.vdi --format VDI
or:
vbox-img convert --srcfilename e:\Ubuntu\clear-linux\clear-12540-live.img --dstfilename e:\Ubuntu\clear-linux\clear-12540-live.vdi --srcformat raw --dstformat vdi

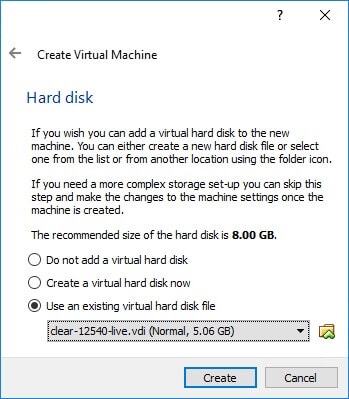
- Now create a new virtual machine using the following settings
- Type: Linux
- Version: Linux 2.6 / 3.x / 4.x (64-bit)
- On Hard disk, select “Use an existing virtual hard disk file”
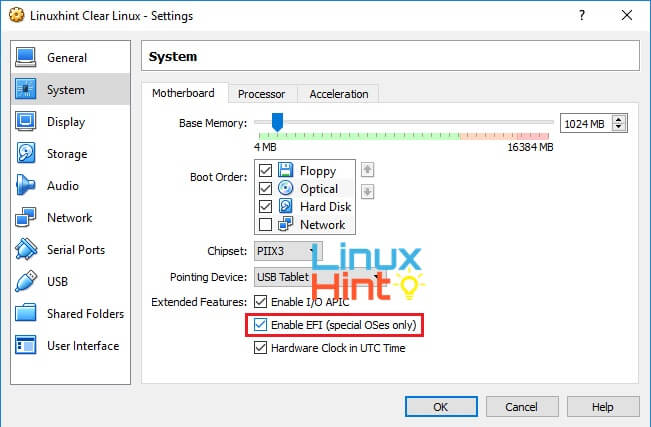
- Next go to settings to enable EFI support
- System -> Enable EFI (special OSes only)
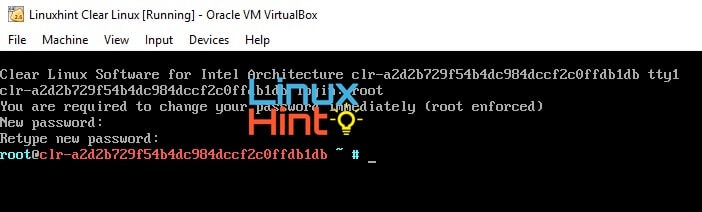
Start and Configure Clear Linux OS
- When you start the VM for the first time, Clear Linux will ask for a login user, type root and then enter new password
Now time to get the OS up and running
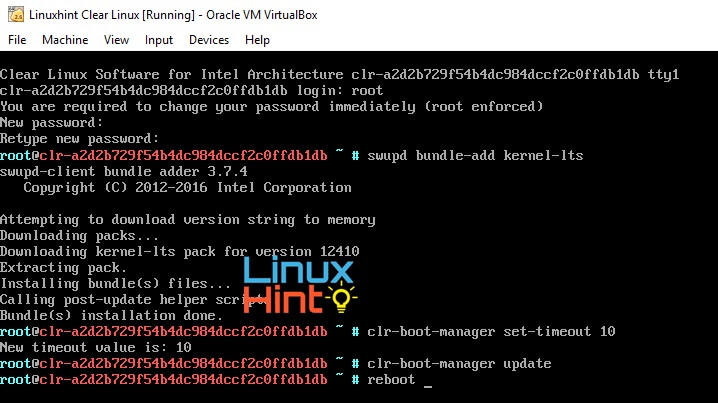
- Install the bundle that supports VirtualBox modules
swupd bundle-add kernel-lts
- Set a timeout in the bootmanager to shows a menu at boot time
clr-boot-manager set-timeout 10
- Update the bootloader entries
clr-boot-manager update
- Reboot the machine
reboot
- On restart, choose LTS kernel version
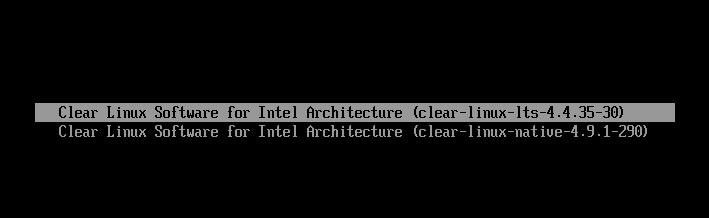
(Optional) Unset timeout to boot directly to LTS version
clr-boot-manager set-timeout 0
- Update bootmanger to use always LTS version
clr-boot-manager update
Next Install Guest Additions
- Install the sysadmin-basic bundle
swupd bundle-add sysadmin-basic
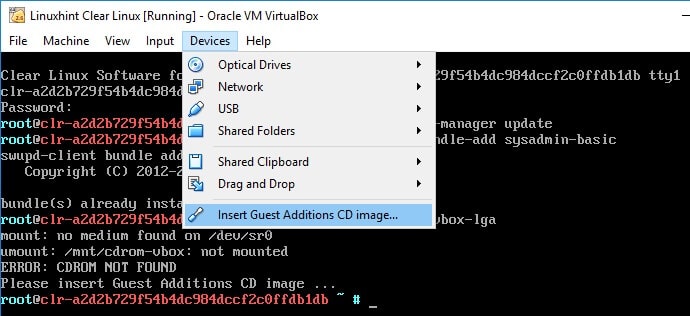
- Insert Guest Additions CD image using Devices menu and Install
install-vbox-lga

- Reboot your system
reboot
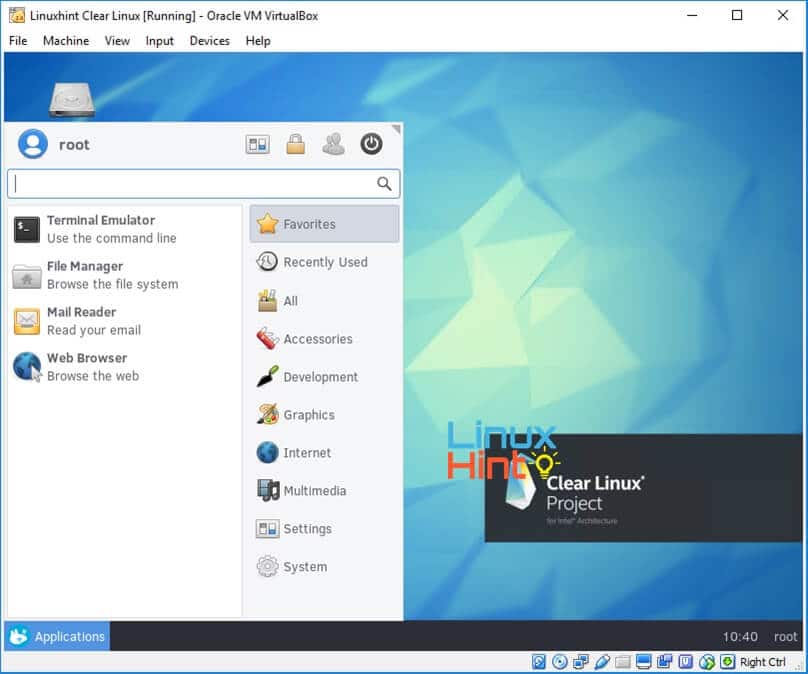
- Setup the Clear Linux graphical user interface ans start it up
swupd bundle-add os-utils-gui

startxfce4
Leave a Comment
You must be <a href="https://linuxhint.com/wp-login.php?redirect_to=https%3A%2F%2Flinuxhint.com%2Finstall-clear-linux-intel-linux-os-on-a-virtual-machine-using-virtualbox%2F">logged in</a> to post a comment.