In the current times, Chrome is the most widely used web browser in the world, and its userbase keeps on expanding even further. However, as more and more complexity got added to it, a few glitches started to emerge here and there. One such bug that started to cause problems for the users was Google Chrome freezing and not responding, which shall also be the topic of our discussion in this article. We will be looking at different solutions to fix the not responding error of Chrome.
Solutions to the Error
There might be several reasons why Chrome might stop working and stop responding to your queries, such as a broken extension or outdated version. Let us now explore all of them.
1. Updating or Reinstalling Chrome
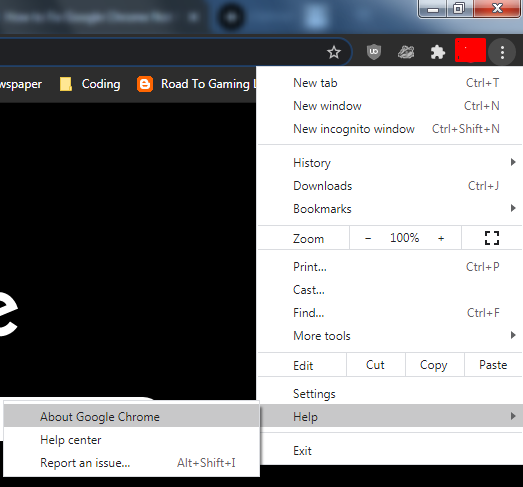
Often, the reason why Chrome is not responding is due to it being out of date. To check to see if your Chrome needs to be updated, click on the three vertical dots, then Help, and then on About Google Chrome.
This will open a new tab and then check whether your Chrome version is up-to-date or not. If it isn’t, then Chrome will automatically update it.
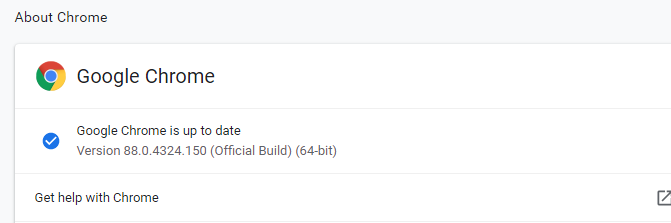
However, if the version is already updated and the not responding issue still exists, it will be better to uninstall your Chrome web browser and reinstall it.
2. Clearing the History, Cache, and Cookies from Chrome
Another reason why your Chrome is maybe acting weirdly might be due to some corrupted cache that might have crept into your browser. In addition to this, sometimes having a large collection of browsing data might overburden your system and may make your Chrome run slower or not respond. Therefore, another good alternative would be to clear your browsing history along with your cache and cookies from your Google Chrome. To do this, open your Google Chrome, then click on the three vertical dots, go to the More tools option and finally select the Clear Browsing Data option. You can also open this using the shortcut Ctrl + Shift + Delete.

This will then open up a window where multiple options will be present for you to select from. For example, you can select the time period, the items you want to remove and choose between the Basic and Advanced option, which allows you to remove your passwords, site settings, and so on.

After doing this, relaunch your Chrome web browser and check to see if the not responding issue has been resolved.
3. Disabling Extensions
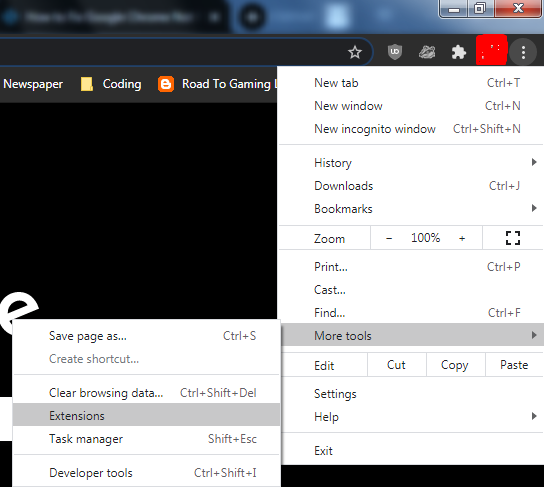
Another reason why your Chrome might not be responding might be due to some extension causing an issue. This may be due to it falling out of date or becoming incompatible with your Chrome, mainly due to not being maintained regularly. To disable your extensions, once again click on the three vertical dots, then the More tools option, and finally on the Extensions option inside of it.
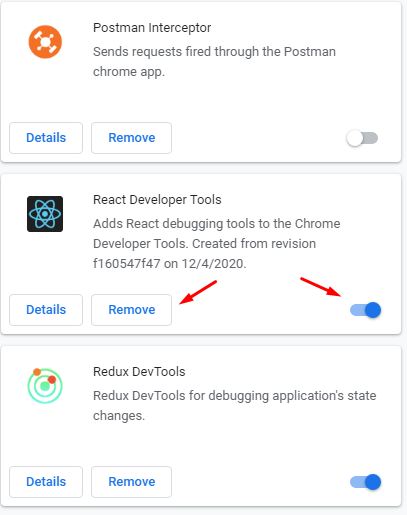
Now, over here, disable your extensions one at a time to see if any one of them might be the reason why your Chrome may not be responding.
4. Adding Chrome to Firewall Exception List
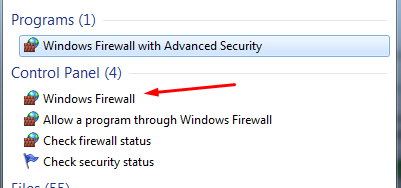
Sometimes the reason why your Chrome might not be responding may have to do with your Firewall blocking it. On Windows, you have to check this through the Windows Firewall. First, search for Firewall in the search menu and open it.
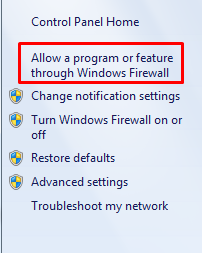
Next, click on the Allow a program through the Windows Firewall option.
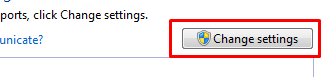
Over here, click on the Change Settings button.
Find and locate Google Chrome from this and tick the option next to it.
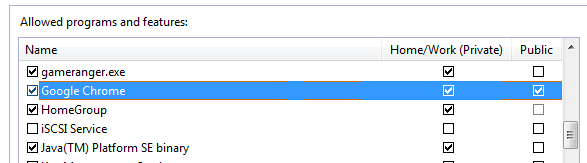
Finally, click on OK and now once again check to see if your Chrome is responding or not.
For Linux users, you can check to see if Chrome is on the list of applications for whom the traffic is allowed. This can be done by running the following command into the terminal:
5. Clearing your DNS Cache
Although this isn’t entirely related to Google Chrome, sometimes DNS caches do tend to affect your network connections as they might have gotten corrupted or broken. To check this, open the Command Prompt by searching your Windows menu.

Next, run the following commands in your terminal:
$ netsh winsock reset
After removing the DNS cache, once again open Chrome and check to make sure if the error has been fixed or not.
6. Resetting your Google Chrome
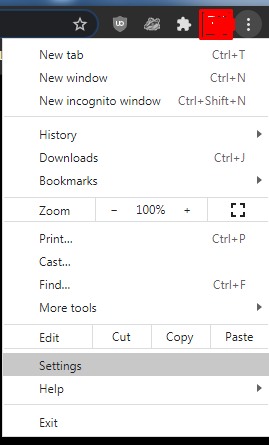
If the issue still hasn’t been resolved, then a good way would be to reset and restore Chrome to its original settings. This can be done by opening Chrome, clicking on the three vertical dots, and then selecting the Settings option.
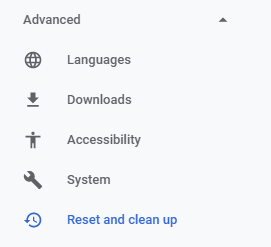
After opening Settings, go to Advanced and select the Reset and clean up option.
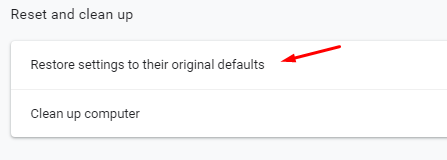
Over here, click on the Restore settings to their original defaults.
This will open up a prompt where you simply have to click on the Reset Settings button.
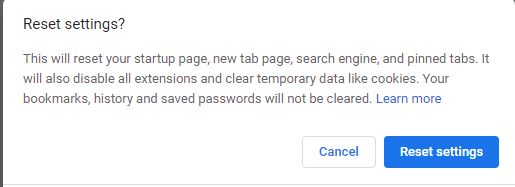
After resetting Chrome, check to see if the problem has been resolved.
Conclusion?
Chrome is one of the best web browsers out there, and it keeps on improving even more. However, despite all its excellent features, it still isn’t flawless and sometimes may act out of order. Therefore, it is important to know how to deal with these errors in the most efficient manner.