- Brief introduction to Nmap scan of IP ranges
- Nmap single target scan
- Brief introduction to subnets
- Nmap subnets scan
- Nmap scan using wildcard (*)
- Nmap scan using a targets list
- Nmap scan of random targets
- Related articles
Brief introduction to Nmap scan of IP ranges
Scanning IP ranges with Nmap (Network Mapper) network scanner is easy thanks to Nmap’s flexibility. You can scan single targets, whole subnets, partial subnets, file lists with targets, you can even instruct Nmap to generate random targets, or to discover possible targets within a network based on specific conditions or arbitrarily. This tutorial focuses on all these methods.
Single IP scan with Nmap
The first introductory example shows how to scan a single target (linuxhint.com), Nmap sees any content of the argument which isn’t an option as a target, the following example doesn’t include options, it only calls nmap and defines the target by its domain name:
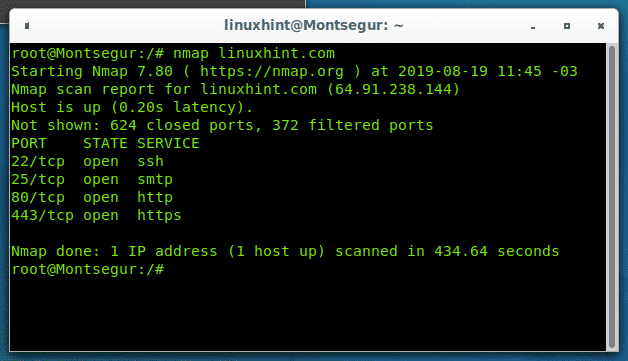
Nmap reveals ports ssh,smtp,http and https are open while 372 ports remain filtered by a firewall and 624 closed. Note Nmap by default scans the 1000 main common ports only.
The following example reproduces the first one but this time using the target’s IP (64.91.238.144) rather than its domain name:
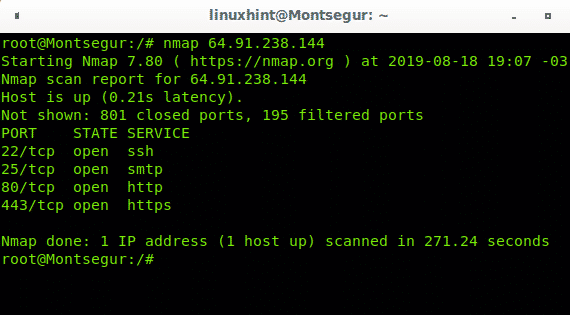
As you can see we get the same output.
Brief introduction to subnets
For this tutorial all we need to know about subnetworks is they are division between the network address and hosts addresses. The network address or octets identify your network and remains immutable for all connected devices belonging to that network, while the host address, or octet, variates from device to device and can’t be used by two devices simultaneously because they represent the host of each computer.
The quantity of octets belonging to the network and to the host variates and is determined by the type of network or IP class. While there are 5 classes of IP addresses (for the IPV4 protocol only) for this tutorial I’ll focus only on classes A, B and C.
All IP addresses with the first octet going from the number 1 to 126 belongs to class A. All IP addresses with the first octet going from number 128 to 191 belong to class B and All IP addresses with the first octet going from number 192 to 223 belong to class C.
| Range | Class | Octets |
| 1-126 | Class A | X.Y.Y.Y |
| 128-191 | Class B | X.X.Y.Y |
| 192-223 | Class C | X.X.X.Y |
Where: X is the network address and Y the host address.
Therefore if your network starts as 192.X.X.X you have a Class C IP and only the final octet will vary to identify each device connected to your network. So if your network is 192.168.0.X, the first 3 octets will remain and only the final octet will be different for each device, one may be 192.168.0.3, other 192.168.0.5, first 3 octets will remain as network identifiers.
There are a lot more to say about subnetworks, but this is the basic knowledge we need for this tutorial on Nmap, for more information on this specific subject visit https://en.wikipedia.org/wiki/Subnetwork.
Nmap subnets range scan
Scanning a range belonging to a Class C network is easy using a hyphen to define the range. My home network is a class C network with IPs 192.168.0.X. The following example shows how to scan a specific range of hosts within my class C network, the range goes from 1 to 30:

Nmap scanned for available hosts on addresses going from 192.168.0.1 to 192.168.0.30 finding 3 devices within the instructed range, nmap shows their opened ports from the most common 1000 ports.
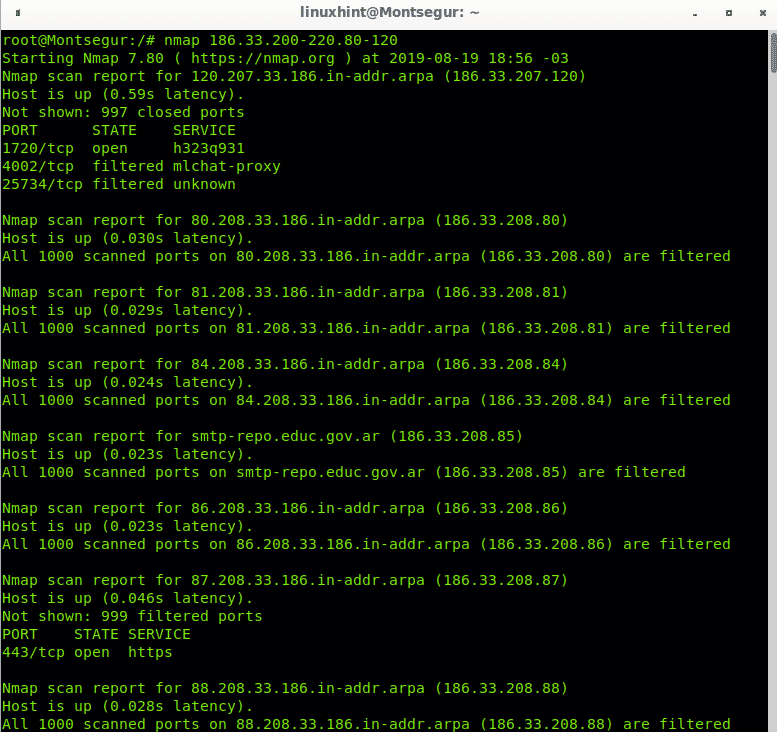
To scan a Class B network specific range we use the same method implementing a hyphen in the last 2 octets. In the following example the last two octets of the Class B network with IP 186.33.X.X will be scanned. For the third octet I will scan the IP range 200-220, while for the fourth octet I will define the range 80-120. Such scan may take a while to end.
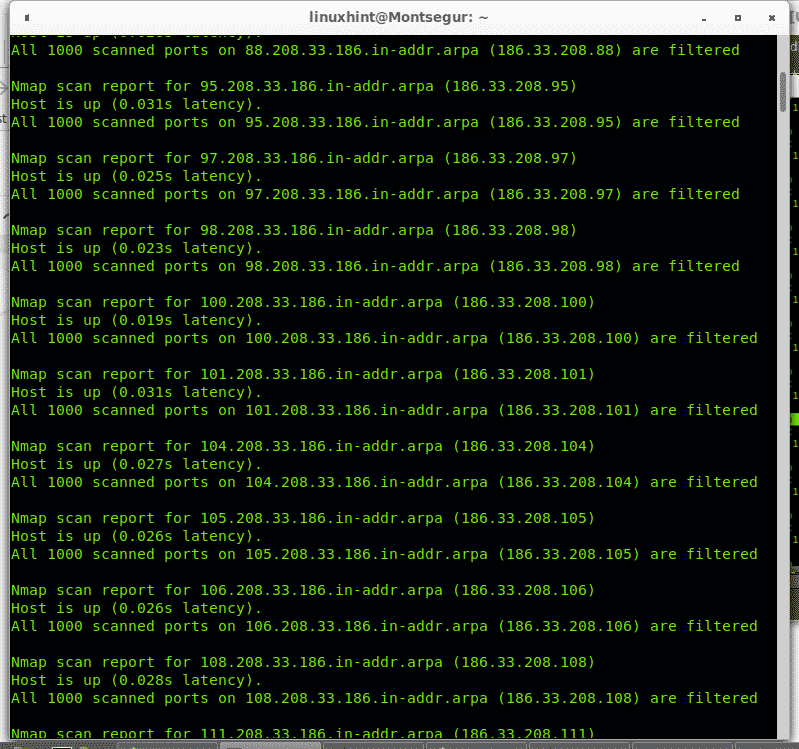
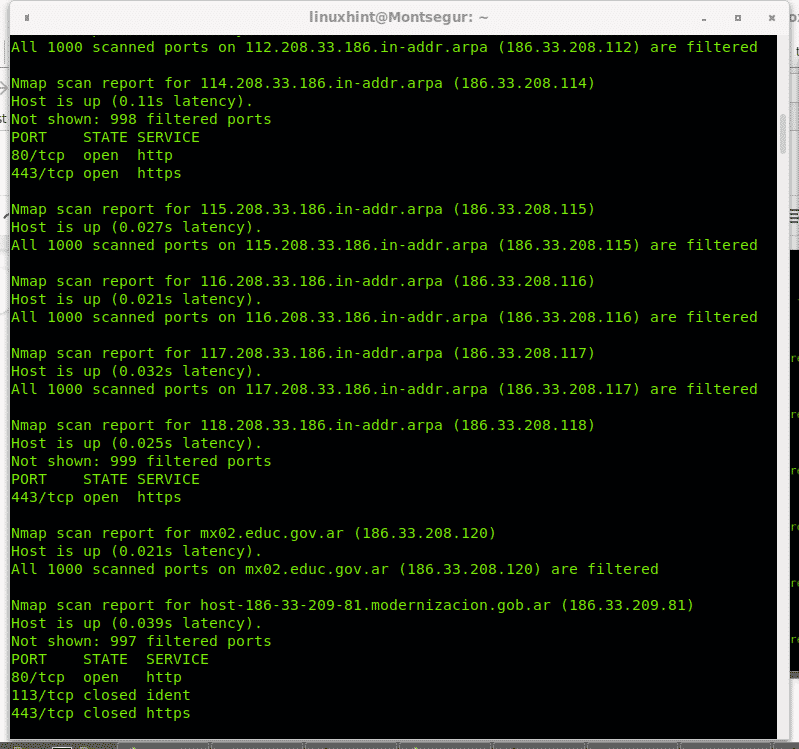
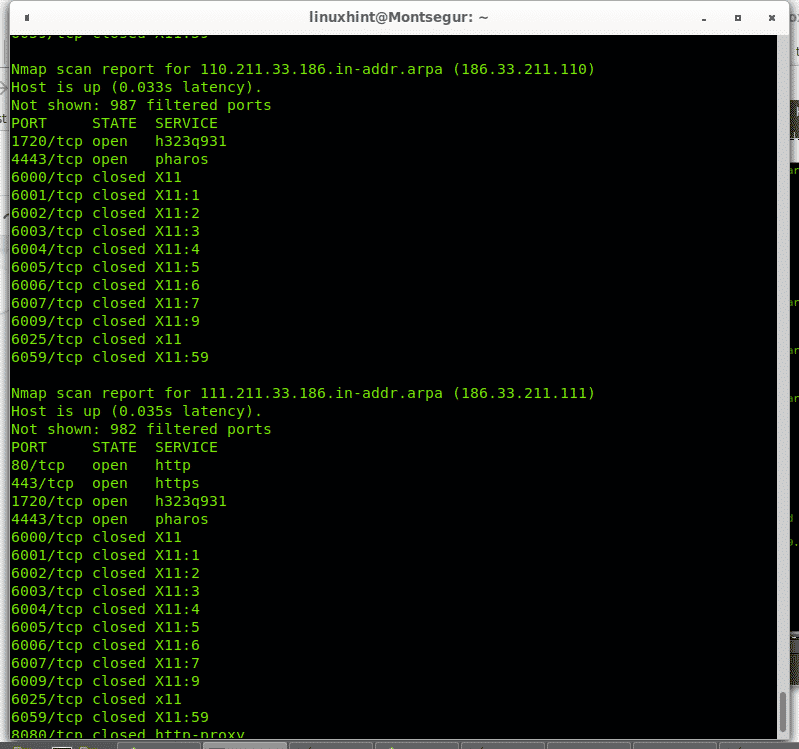
And the list continues…
Full octet scan
The examples above show how to scan ranges belonging to subnetworks Class A and B, what if rather than defining a limited range we want to scan the whole octet?, you can define a range between 1 and 254. But you can also use the wildcard (*) to instruct Nmap to check all available addresses. The following example instructs Nmap to scan all hosts of a Class C network:

Nmap scanned all IP addresses belonging to this Class C network.
You can use the wildcard to scan all host octets for any network, but be aware using the wildcard may result in a long process.
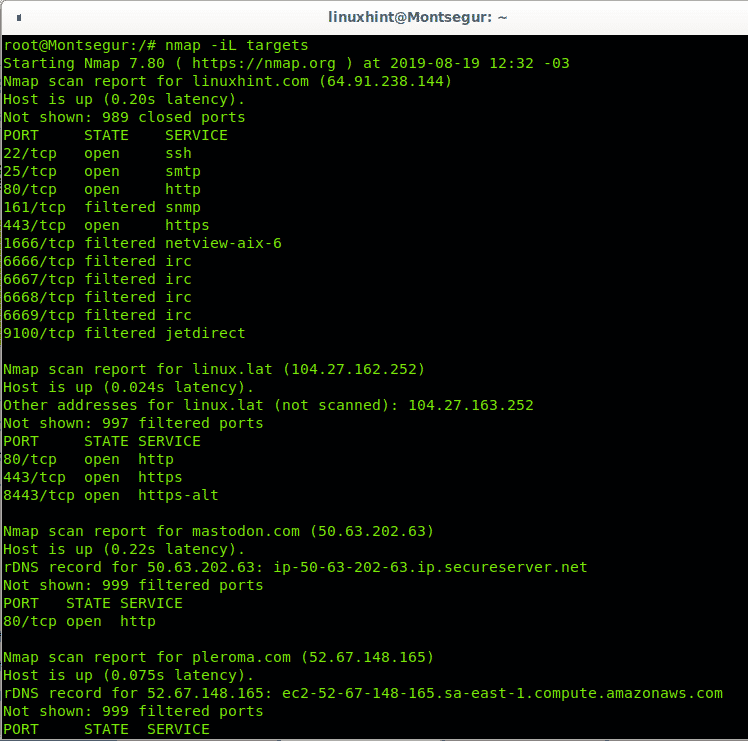
Nmap scan using a targets list
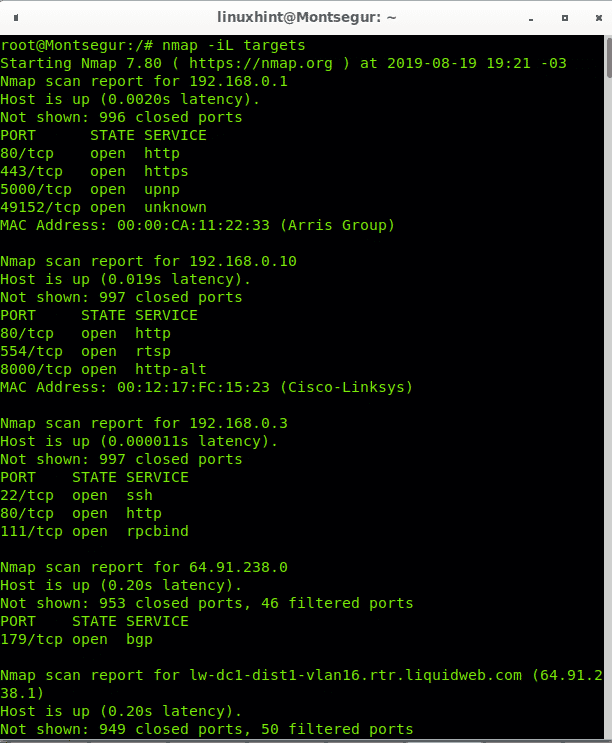
Using files with predefined targets to scan to Nmap is pretty easy, in the file you only need to set a target, or a range per line. Create a file called targets by running:
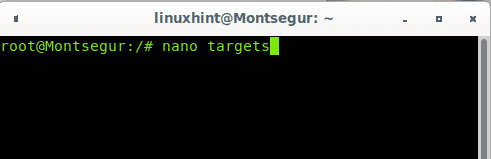
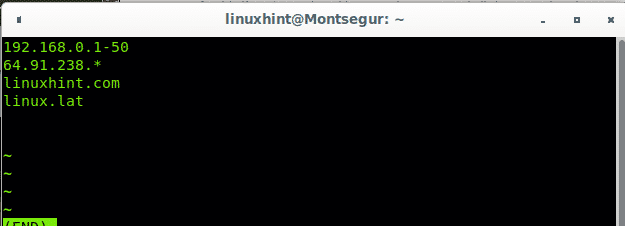
Then include targets you would like to scan, one target per line as shown in the image below:
Then run Nmap including the option -iL and defining the list as target:
More results below…
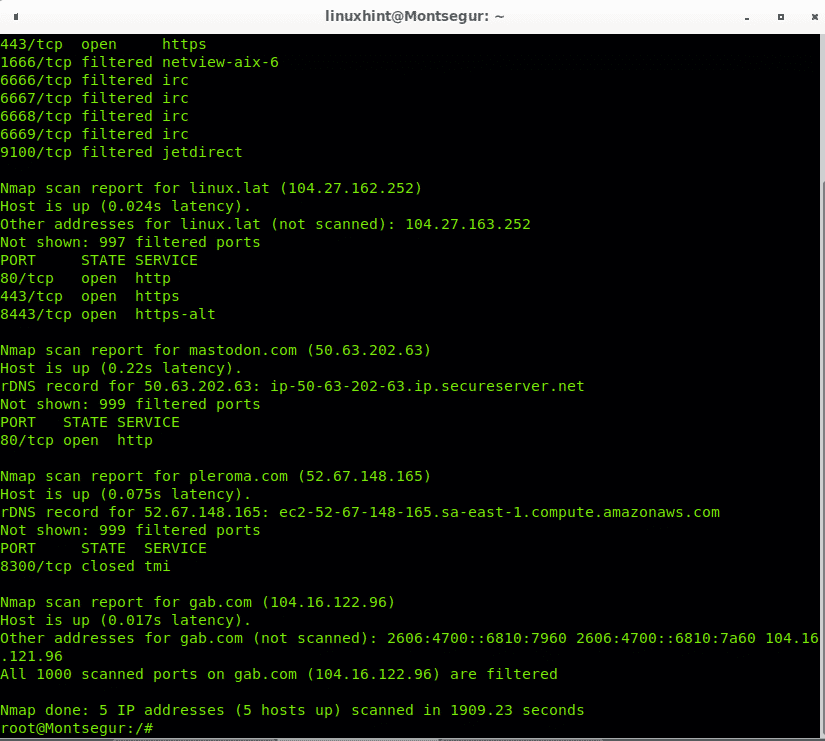
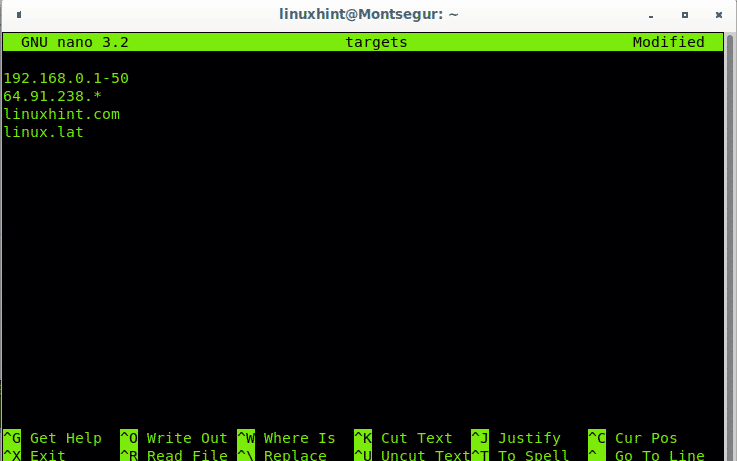
As you can see all hosts from the file were scanned. You can also include ranges within the file, edit your hosts list and include your local network subnet, in my case an example would be 192.168.0.1-50. I will also use the wildcard to scan the last octet of some class A IP addresses.
Edit the file you just created with nano and add any range you want using wildcard, hyphen or both them as in the example below:
Then run the command again:
As you see Nmap will also scan all IPs within the provided ranges with hyphen and wildcard:
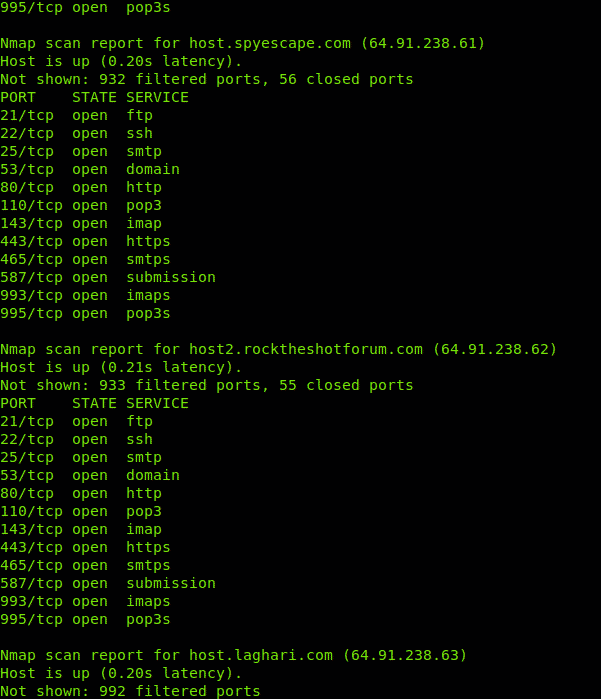
And continues…
Nmap Random IP Scan
The option -iR allows to instruct nmap to randomly generate a targets list, you decide how many targets Nmap will generate. To generate 10 random targets the syntaxis is:
Since the 10 random targets are created randomly, it is never sure these generated hosts are online, from the 10 targets we instructed Nmap to create it found 4 alive.

I hope this tutorial was useful for you to learn to manage Nmap targets. Keep following LinuxHint for more tips and updates con Linux and networking.