- Introduction to the Internet Model
- Introduction to Nmap
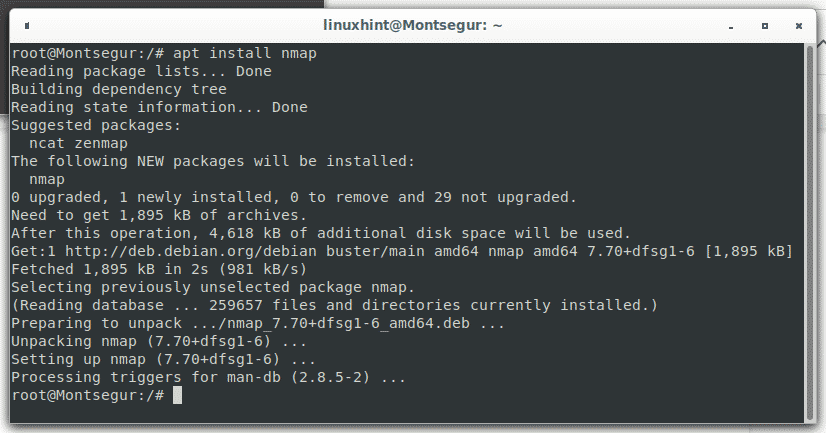
- Installing Nmap on Debian
- Installing Nmap from sources (all Linux distributions)
- Nmap basic scan types
- Nmap scan phases
- Nmap port states
- Defining targets with Nmap
- Related articles
Introduction to the Internet Model
The current sections aim to briefly and easily describe the theory behind the Internet Model or Internet Protocol Suite (Not the OSI Model). While some experts used to include the physical layer, this tutorial ignores it since it doesn’t really belong to the Internet Model and is fully indifferent when using Nmap. If you are already familiarized with the Internet Model you can start reading from Introduction to Nmap.
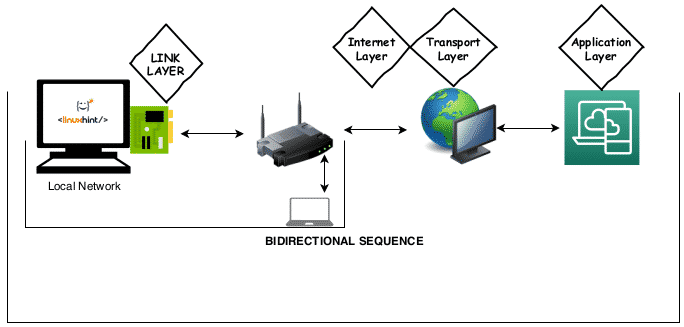
When communicating between devices through a network there are processes called layers which consist from the voltage produced by our hardware, such as a network card, to the code produced by the software we are interacting with such as an FTP server. We can think about this process as a kind of translation (which isn’t really since each layer adds new information to the “packet” which can be also a frame), a translation from binary 0 and 1, bits and frames to code.
Within the Internet Model there are 4 layers, the link layer, the internet layer, the transport layer and the application layer. Layer levels do not implicate a chronological order but a complexity level. The communication when using Nmap against a remote target starts from the Application layer, then continues to the Transport layer, then the Internet layer finally the Link layer and then the target’s Link layer, the target’s Internet layer, the target’s Transport layer and finally the target’s Application layer.
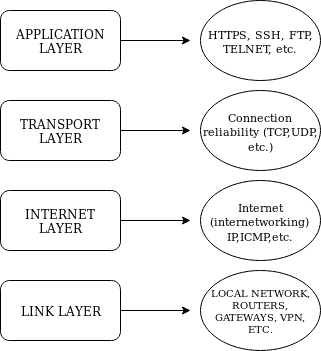
What each layer does?
Link layer: the Link layer is the lowest level layer of the called Internet model, it is the layer which allows our device to connect or interact with the local network or hardware attached to our network, such as local network computers, routers, hubs or gateways to be later processed by the next layer, the internet layer. This layer can be also used to communicate between VPN (Private Virtual Networks). Nmap uses the link layer to discover hosts on our local network and to resolve Link Layer Addresses such as MAC addresses by sending requests through the ARP protocol (Address Resolution Protocol) to discover devices using IPV4. For devices using IPV6 the Link Layer protocol is the NDP (Neighbor Discovery Protocol) which implements improvements over the ARP protocol. The Link Layer does not work for communication between different networks like the internet and its use is only for both physical and virtual local networks.
Internet layer: contrary to the Link layer, the Internet Layer, the second level layer of the Internet Model, communicates between different networks, from there its name “internet” which implies internetworking. The main protocol of the Internet Layer is the IP (Internet Protocol) used to deliver packets through networks, the protocol ICMP (Internet Control Message Protocol) also belongs to the Internet Layer to diagnose and report errors in the communication. Despite the ICMP protocol belongs to the Internet Layer the reliability of the connection relies on the third level layer, the Transport layer.
Transport layer: the third level layer within the Internet Model is the Transport layer and its task is to apply the proper rules and management for the communication between nodes for example, avoiding congestion or allowing to connect to multiple nodes simultaneously (being closely tied to the Application layer). Its main protocol is the TCP (Transmission Control Protocol) which provides connection quality. The UDP (User Datagram Protocol) protocol also belongs to the transport layer, it is faster than the TCP protocol but indifferent to errors resulting in a lower but safer connection.
Application layer: while the fourth level layer, the Application layer, uses all previous mentioned layers to communicate it covers a higher level of protocols such as HTTP, SSH, POP3, SMTP, FTP,etc. Protocols which define the functionality of an application. The Application layer is used by Nmap to determine service versions and software.
The following image summarizes the explained above.
Introduction to Nmap
Nmap (Network Mapper) is the leading security scanner, written in C/C++, it is useful to discover hosts, to map and scan networks, hosts and ports and by implementing the NSE (Nmap Scripting Engine) you can also detect vulnerabilities on your target (check the Related Articles section for examples).
Installing Nmap on Debian
Installing Nmap from sources (all Linux distributions)
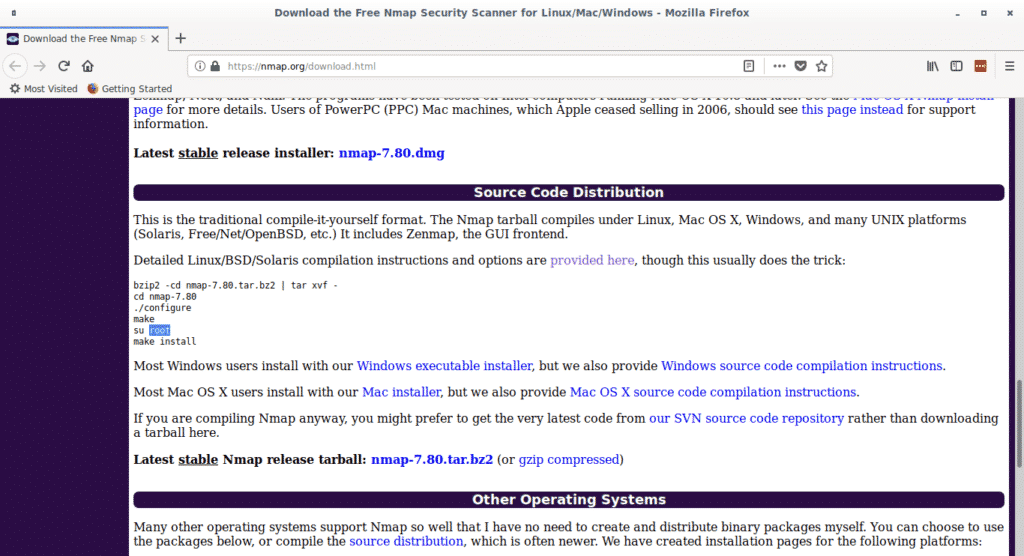
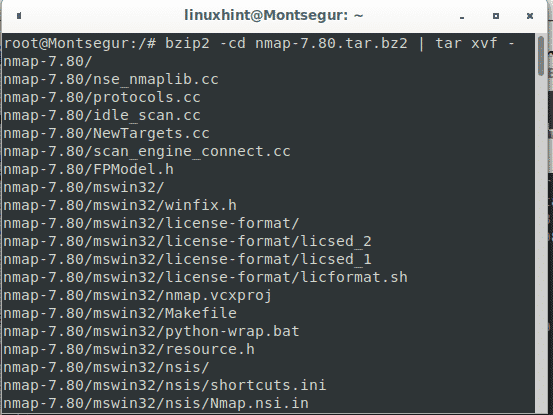
For this tutorial I will install the current version of Nmap 7.80, probably it will be outdated when you read this, keep sure you are using the last version which you can download from https://nmap.org/download.html and replace the “nmap-7.80.tar.bz2” mentioned in this toturial for the correct one.
After copying the file’s url run:

Extract nmap by running:
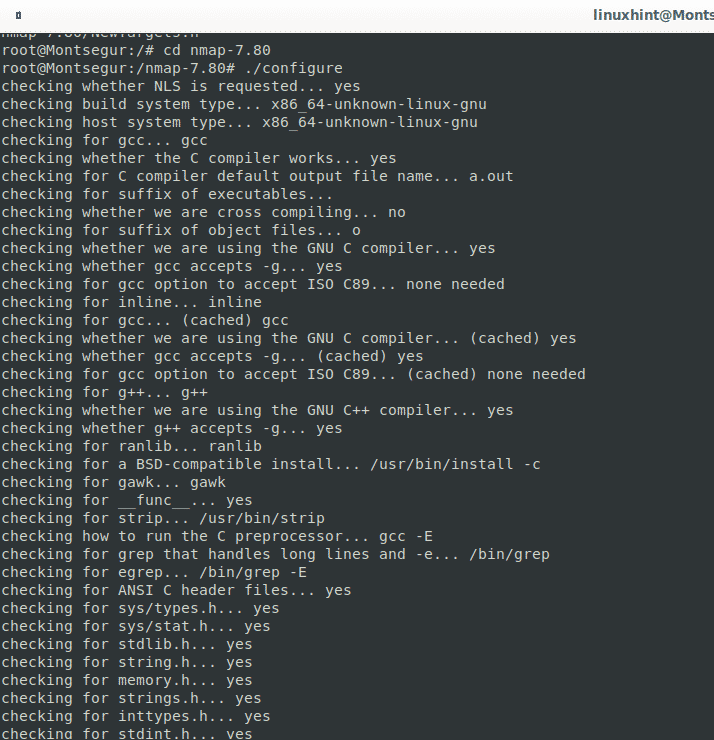
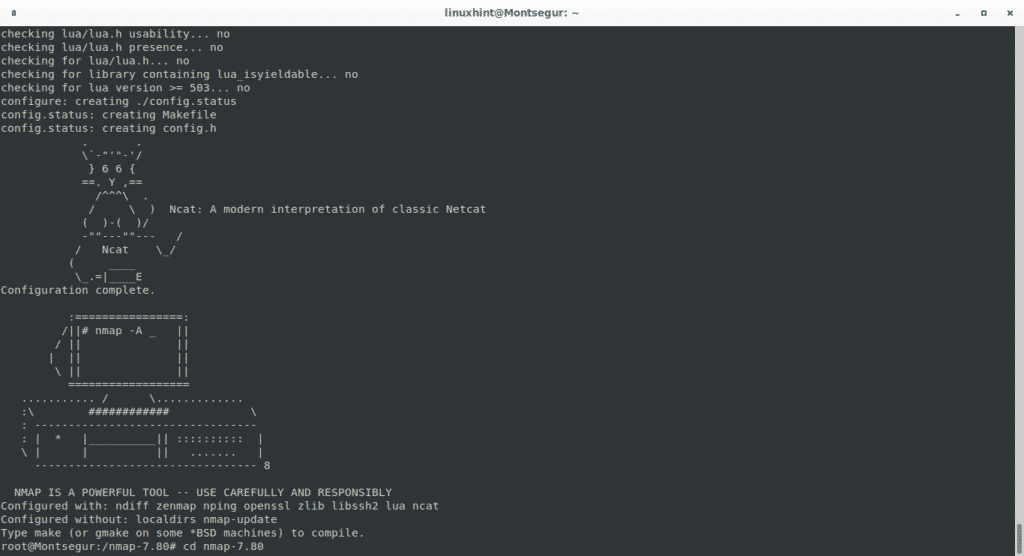
Then enter the Nmap directory by running “cd <nmapDirectory>” and then run ./configure.
./configure
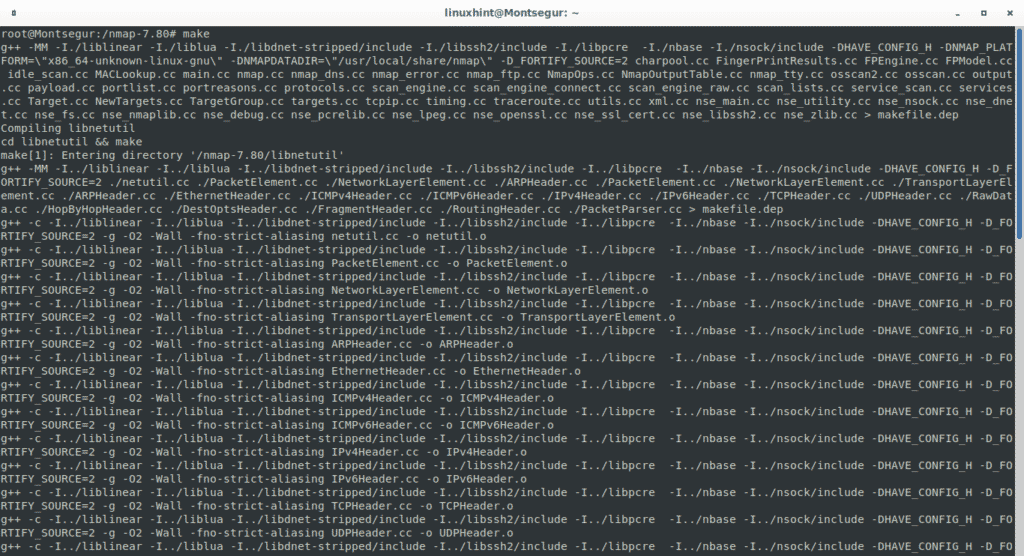
After running the configuration file run make:
And finally run:


Nmap basic scan types
Regular Nmap scans are carried out through TCP and SYN scan. When the scan process is TCP a connection is established with the target. With a SYN scan, the connection is cancelled or dropped before getting established.
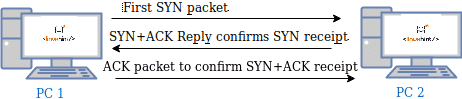
The following figure shows how connections are established: first the computer (PC 1) trying to establish the connection sends a SYN packet requesting the destination device to synchronize. If the destination device (PC 2) is available to establish the connection it answers with another SYN packet to allow synchronization and with an ACK (acknowledge) packet confirming the receipt of the first SYN packet sent by the computer which requested the connection, then the computer which requested the connection (PC 1) sends an ACK packet confirming the receipt of both the SYN and ACK packets confirmation sent by the destination device (PC 2.)
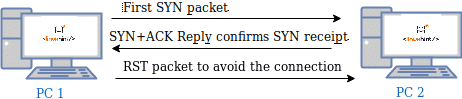
When a connection is established it is detected by firewalls and get logged, that’s why the SYN scan was implemented, the SYN or Stealth scan sends a SYN packet and after receiving the destination replies instead of replying back with an ACK packet it sends a RST (reset) packet to cancel the connection before it was established as shown in the following image:
In this way the connection isn’t logged, but you still need to deal with Intrusion Detection Systems capable to detect SYN scans. To avoid detection you can use stealthed scan techniques which will be explained in coming tutorials.
Nmap scan phases
Nmap goes through 11 stages during the scanning process, some of which are optional according to our instructions, for example the pre and post scan scripts are executed only if we use NSE.
- Script pre-scanning: the “Script pre scanning” option calls scripts from the Nmap Scripting Engine (NSE) for the pre scanning phase, this stage only takes place when the NSE is used.
- Target enumeration: In this phase Nmap processes information on the targets to scan such as IP addresses, hosts, IP ranges, etc.
- Host discovery (ping scanning): Nmap learns what targets are online or are reachable.
- Reverse-DNS resolution: Nmap looks for hostnames for the IP addresses.
- Port Scanning: Nmap will discover ports and their status: open, closed or filtered.
- Version detection: in this phase nmap will try to learn the version of the software running in open ports discovered in the previous phase, like what version of apache or ftp.
- OS detection: nmap tries to detect the target’s OS.
- Traceroute: nmap will discover the target’s route on the network or all routes in the network.
- Script Scanning: This phase is optional, in this phase NSE scripts are executed, NSE scripts can be executed before the scan, during the scan and after it, but are optional.
- Output: Nmap shows us information on the gathered data.
- Script post-scanning: optional phase if scripts were defined to run after the scan.
For more information on nmap’s phases visit https://nmap.org/book/nmap-phases.html
Nmap Port States
When scanning for services Nmap may report up to 6 states or condition of scanned ports:
- Open: the port is open and an application is listening through it.
- Closed: the port is closed, not application is listening.
- Filtered: a firewall prevents nmap from reaching the port.
- Unfiltered: Port is accessible but nmap is unable to check it’s state.
- Open|filtered: Nmap is unable to determine if a port is open or filtered.
- Closed|Filtered: Nmap is unable to determine if a port is closed or filtered.
Defining Targets with Nmap
Nmap is extremely flexible and you can define targets in a variety of manners.
Single IP scan:
For this example, to show a single scan we’ll scan LinuxHint.com by running:

Of course you can define the target by it’s IP too, LinuxHint.com IP is 64.91.238.144, the syntaxis is the same:
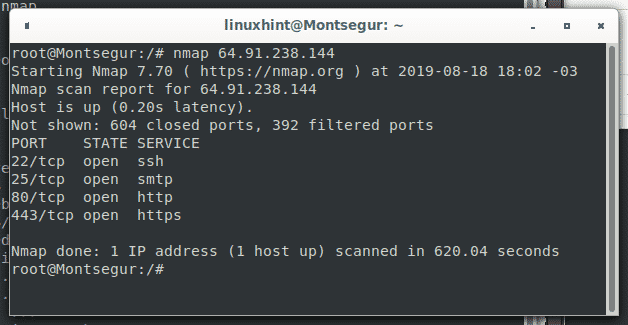
As you can see is the same output.
IP range scan:
You can also scan IP ranges using hyphens to define the range, the following command will scan from the IP 192.168.0.1 to IP 192.168.0.20, leaving the rest without scanning:
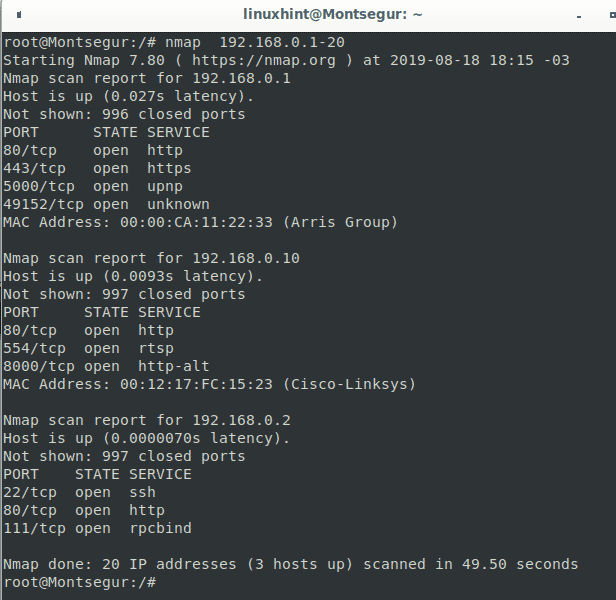
As you see Nmap found 3 live hosts on the defined range.
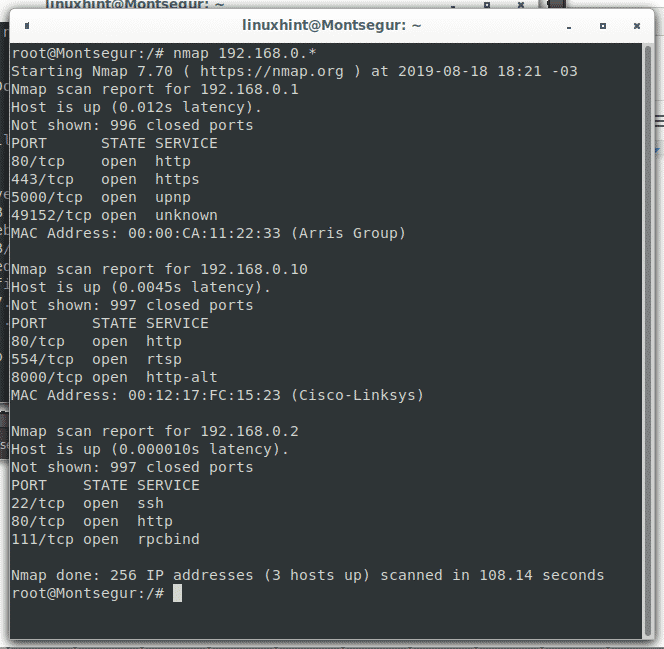
Full octet scan:
While you can use the hyphen to mark a range between 0 and 255, you can also use the wildcard (*) to instruct nmap to check the whole octet’s range as in the following example:
Random scan with Nmap:
You can also instruct Nmap to generate a random list of targets to scan, in the following example I instruct Nmap to generate 3 random targets to scan, it is possible the addresses generated by Nmap don’t belong to an available host, Nmap doesn’t test the existence or availability of these hosts previous to generate the list.
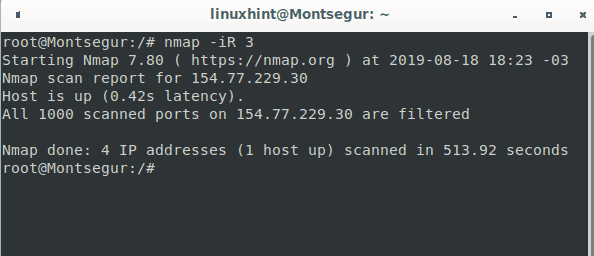
As you see from the 3 random targets generated by Nmap one existed and Nmap scanned 1000 ports and found all of them filtered by a firewall.
There are more combinations to define targets, for example you can allow ranges in more than one octet or including a file with a list of targets, this will be explained in coming tutorials.
Keep following LinuxHint for more tips and updates on Linux and networking.