Installing Fedora in a VM is a great way to get your feet wet when it comes to the whole Red Hat ethos. That said, we will be using VirtualBox 5.2.12 which is the latest version of VirtualBox available at the time of this writing. So let’s get started.
Step 1: Creating a VM and Allocating resources
Virtual Machine is an abstraction created to lie to a guest operating system that it is running on hardware, only its “Virtual Hardware” or a Virtual Machine. The guest operating system would then treat this VM as if it were regular hardware (to a fair degree of accuracy). But first we need to create the virtual hardware.
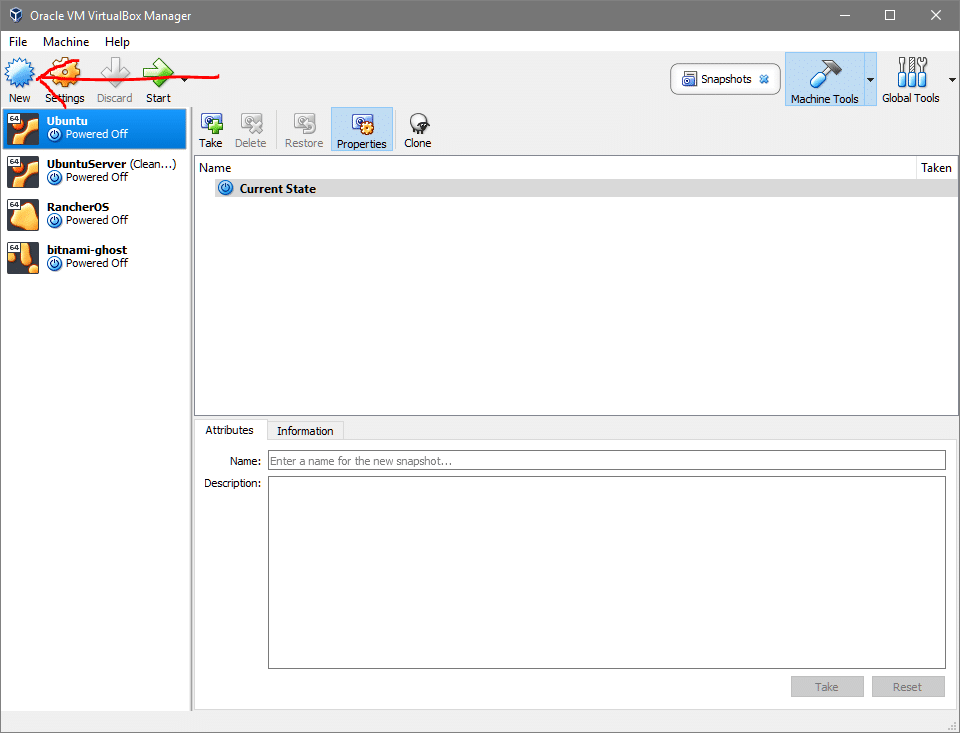
In VirtualBox, in the upper left corner find an Icon which says “New”. This will open up a Virtual Machine setup wizard which will walk us through the process.
Set the memory to at least 2GB (2048 MB) for a smooth experience, as shown below.
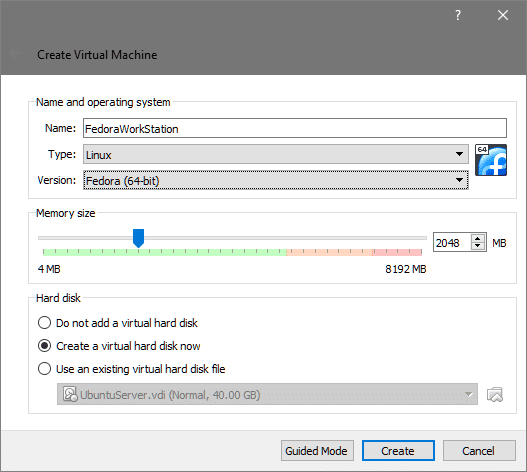
Click on “Create” to move on to creating a virtual hard disk for your VM.
Select the size for your virtual hard disk along with the format. We recommend at least 10GB of space, as per Fedora’s official minimum requirements, and .vdi format which works the best with VirtualBox.
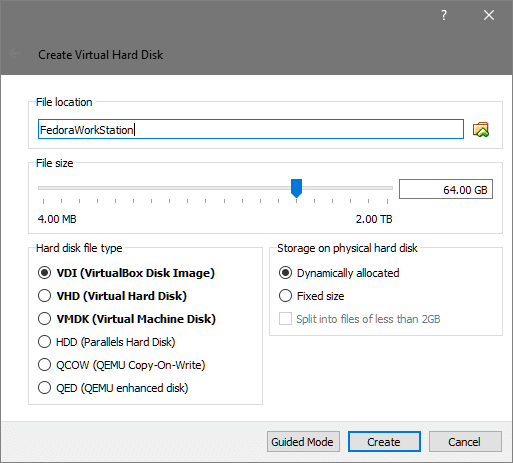
Click on “Create” and your Virtual Machine is ready for Fedora.
Step 2 (Optional): Tweaking your VM settings
We will be making two tweaks to improve our experience with the VM a bit better. This includes:
- Increasing the core count to 2
- Changing the network interface to Bridge
To begin with, right-click on your newly created Fedora VM and select settings and go to Settings → System → Processor
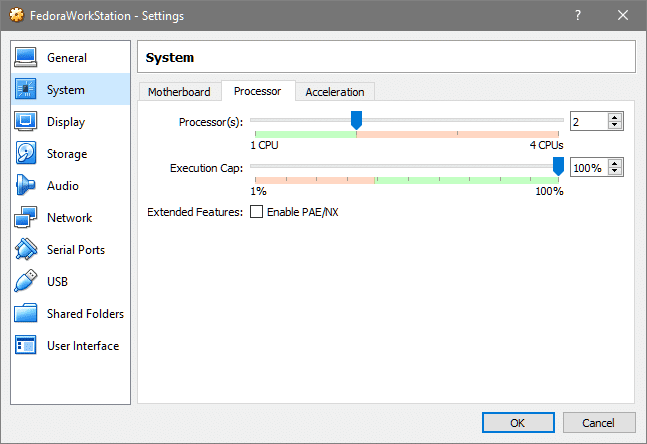
And if you have a multicore processor dedicate 2 core to it. Stay inside the Green region and avoid the Red Shaded area otherwise your host won’t be as responsive or it might even crash!
Next, click on Network from the left column and select the kind of Networking Interface(s) you might want to add to it. For example, when launching a web server in a VM, a typical thing to do is to select Bridge Adapter which makes the VM a part of your LAN.

This means, in a typical home setup where you have a router (access point) to which your phone, computer and other devices are connected, your VM will be able to talk to these devices. So if you host a website in this VM, your mobile phone or any device connected to your home network can see this website.
On the other hand, the default NAT configuration allows your VM to only be able to talk to the host system and the host system offers internet connectivity for gettings updates, browsing, streaming, etc.

Step 3: Installing the Operating System
We will be installing Fedora 28 Workstation on this VM. To get your copy of the .iso file click here.
To start the VM, simply double-click on it from your VirtualBox GUI. Since there’s no operating system installed, the virtual hard disk is not bootable. VirtualBox notices that this is the first time we are booting the system so it prompts us to select a start-up disk.

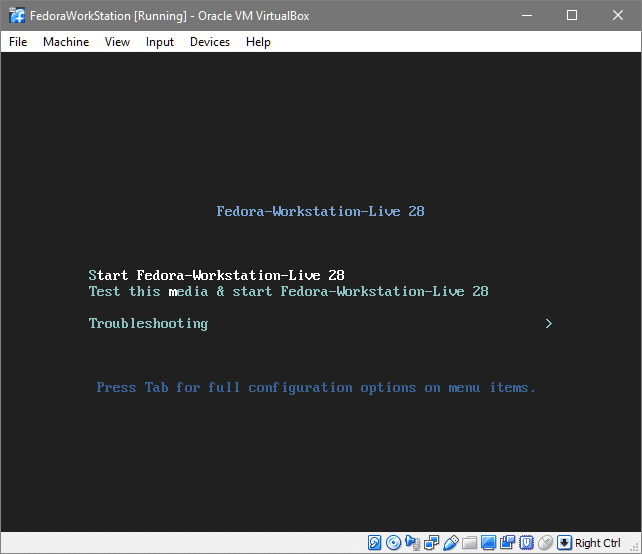
Click on the file icon, and locate Fedora .iso, that you downloaded earlier, inside your file system. Once that is selected, click “Start”. Upon this you will be asked what is it that you want to do with this .iso. Since such live media devices are used not only for installation but for system recovery or rescue and troubleshooting.
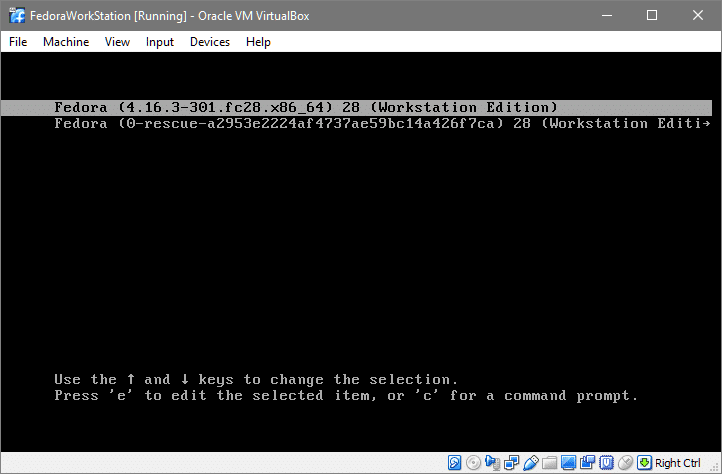
But since we want to install the system we will select the top-most option which says “Start Fedora-Workstation-Live-28”. Use arrow keys to go toggle through the options and return key to select the required one.
Once the live media is booted, Fedora would help us easily install the operating system on our Virtual Disk. The welcome menu would automatically ask you for that, as shown below:
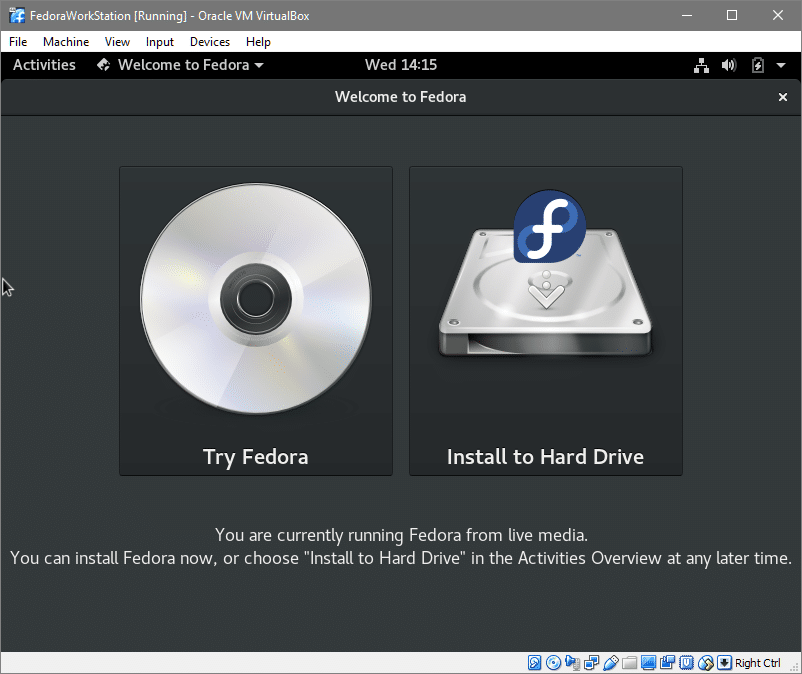
Select “Install to Hard Drive”. Select your language, we assume English (US , UK or any country of you live in) would be a good choice, since you are reading this.

Hopefully, Time and Date would be automatically selected at this point. If not, then click on “Time & Date” and select the appropriate option.
Once that is done, click on the “Installation Destination” so we can pick what device we are going to install Fedora on (in case, you have multiple storage devices attached to your system).
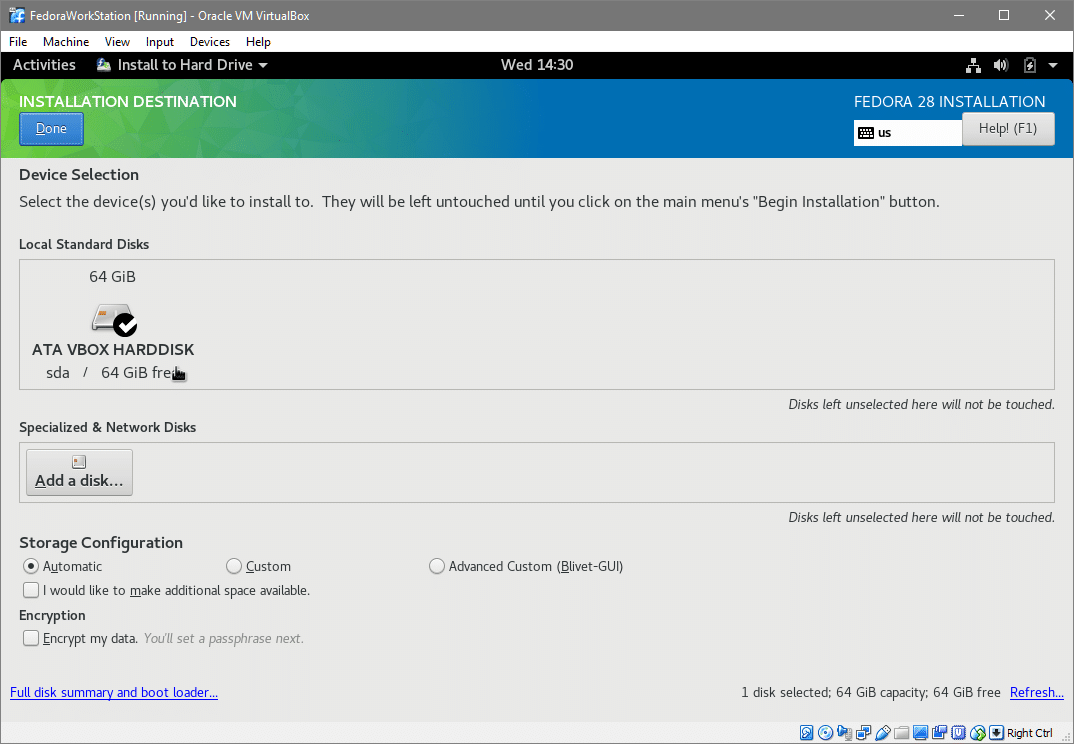
Let everything stay at its default value, and Fedora will handle the storage and partitioning for you. Unless you have a specific use case in your mind, in which case, feel free to experiment.
Click “Done”, on the top-left, once you have verified the destination (or configured it).
You will notice that the “Begin Installation” button, which was greyed out earlier, is now highlighted. Click on it and Fedora will start OS installation.
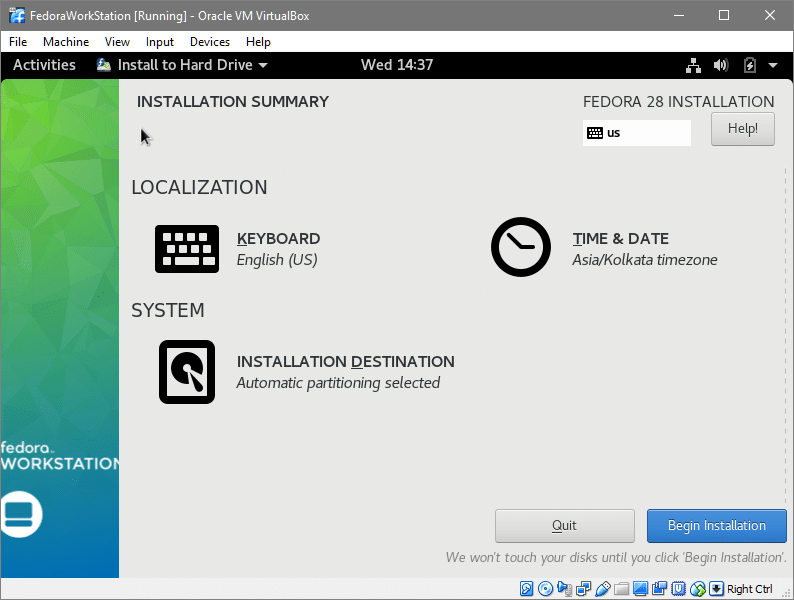
This will take a while but requires no further assistance or intervention until it finishes installing the OS and boot manager. After the installation is complete, we shutdown the system to remove the installation media.
To remove the installation media, simply right-click on the machine (In VirtualBox GUI), go to Settings → Storage

Select the Fedora-Workstation-Live, select the CD icon on the right-most side and Remove Disk from Virtual Drive.
Step 4: User Accounts and System Updates
Click OK, and start the system again. The boot menu will pop up, select Fedora and not the rescue option.
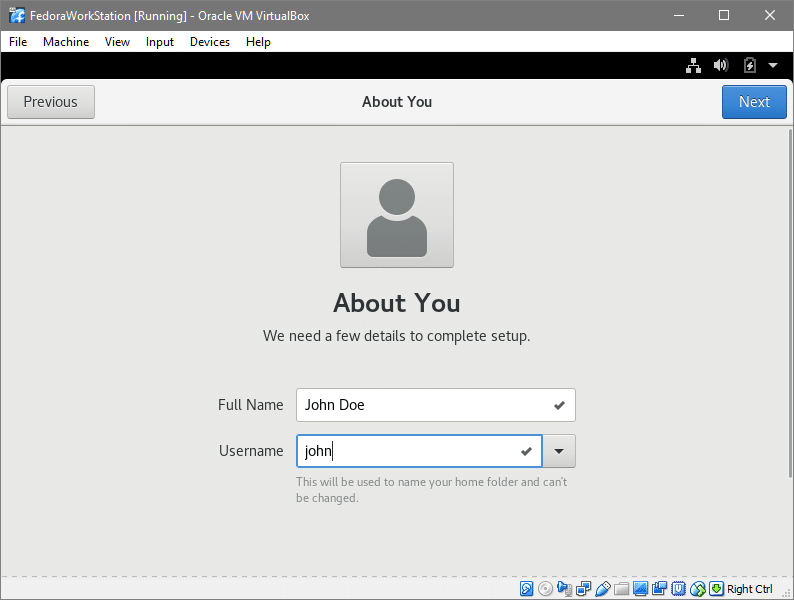
Now Fedora will greet you with a Welcome screen where it will ask you for permissions for collecting user data and crash reports, and if would you like to sign up using one of your many email or social media accounts. You can skip through these, if you like, and then you will come to the part where you set up a username and password.

After this Fedora is officially ready to be used as your personal workstation OS!
Update your system by opening up a terminal and running the following commands:
$ dnf upgrade
Conclusion
That’s it! We have a fully update-to-date Fedora installation for you to experiment with and work at. Take a snapshot so you can restore it when things go wrong. Let us know what other things you want run on VirtualBox or if there’s a cool customization that you want us to make happen.